A more technical summary of how I built my tileserver – part 2

[Update 20180923: continues from here]

The objective

I started discussing the coastline shapefile problem in first post.

Early on, I found the tool called QGIS Browser and installed it on my desktop. I used this to examine the shapefiles I was creating.

The first step was to look at the “real Earth” OpenStreetMap-provided shapefiles I was trying to emulate – the two mentioned in my previous post:
/openstreetmap-carto/data/land-polygons-split-3857/land_polygons.shp
and
/openstreetmap-carto/data/simplified-land-polygons-complete-3857/simplified_land_polygons.shp

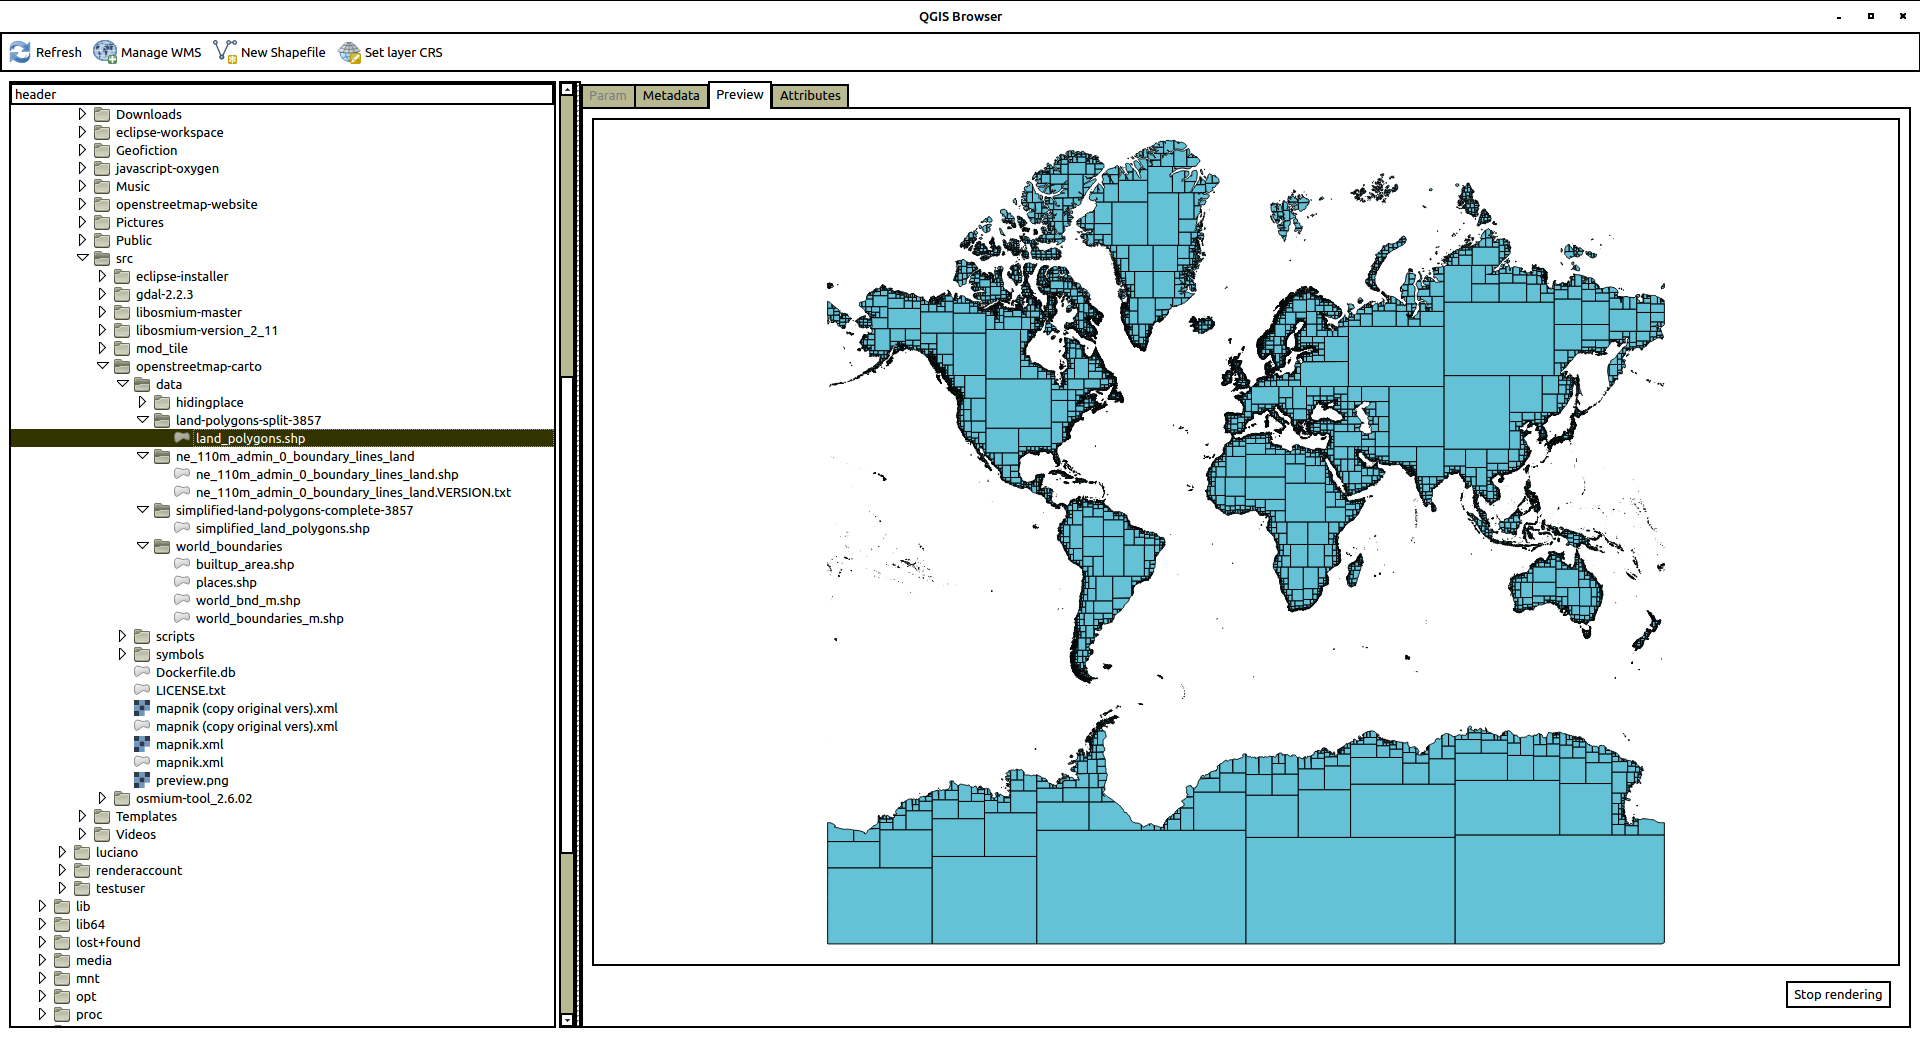
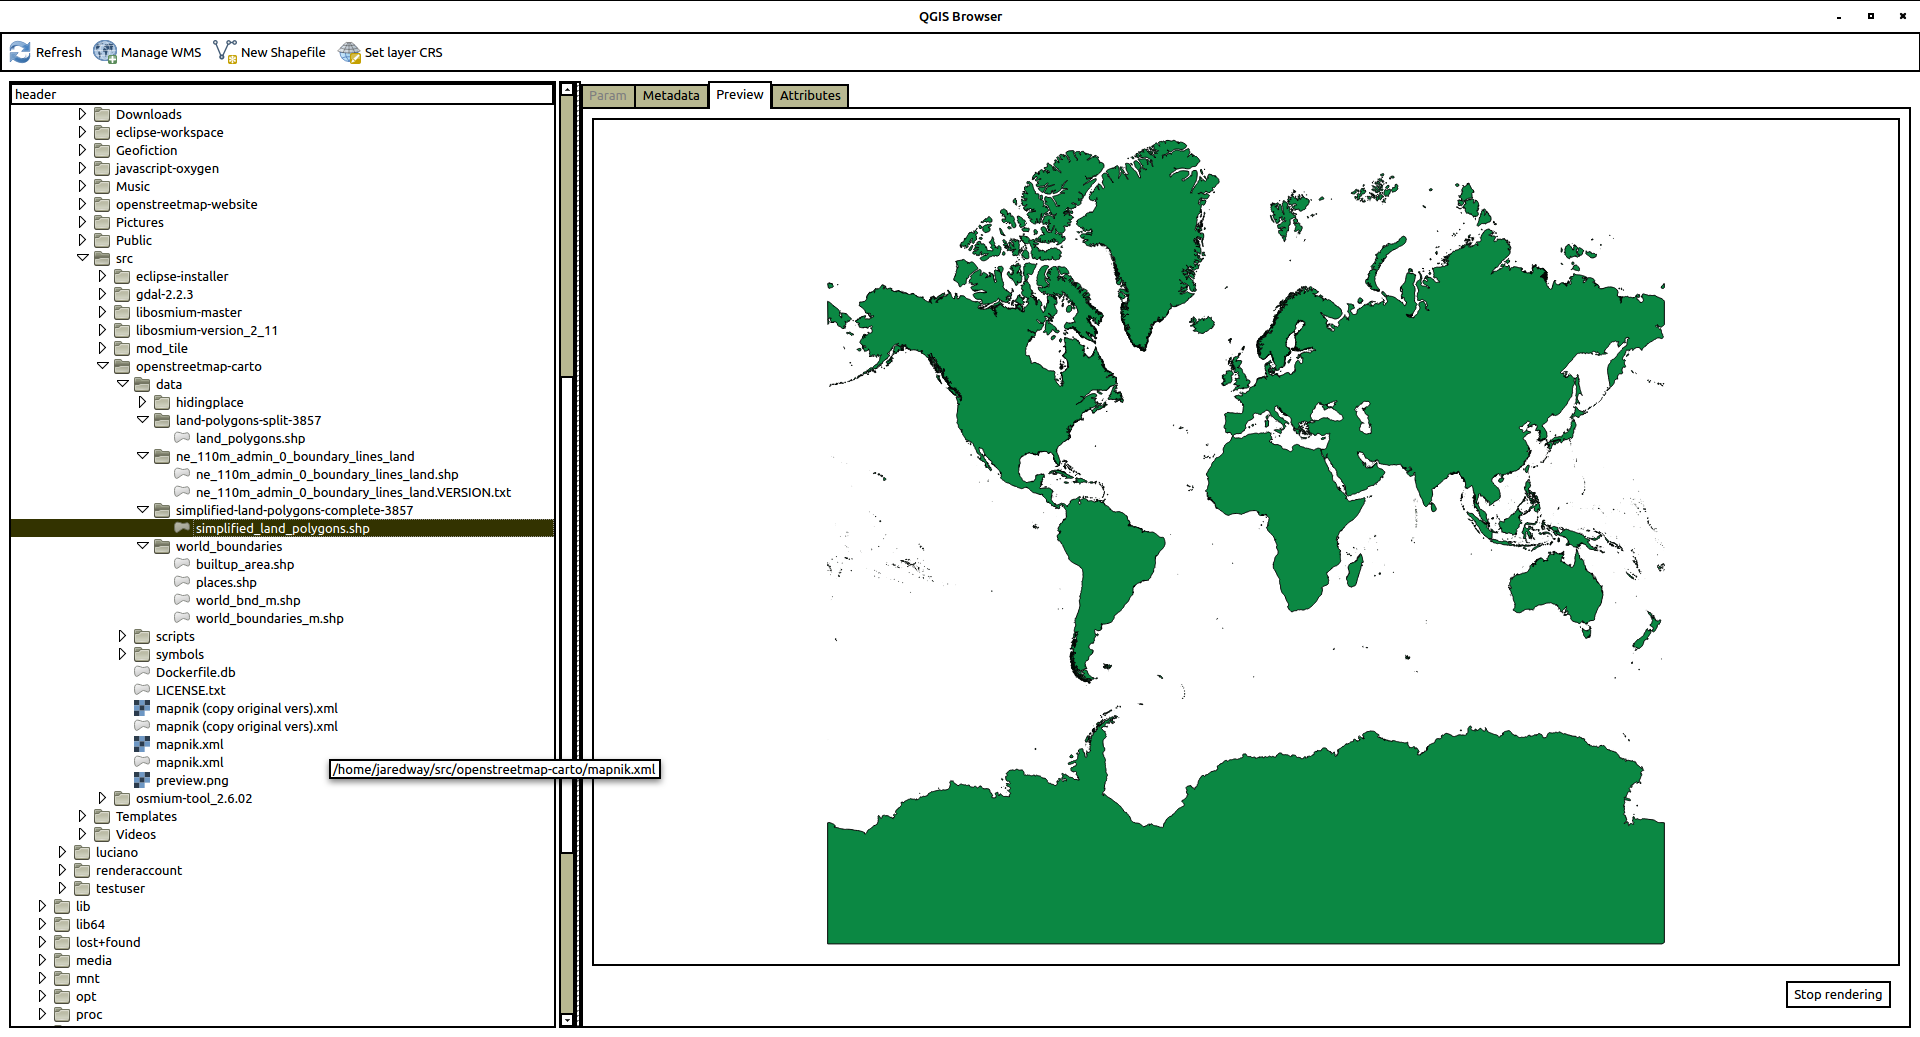
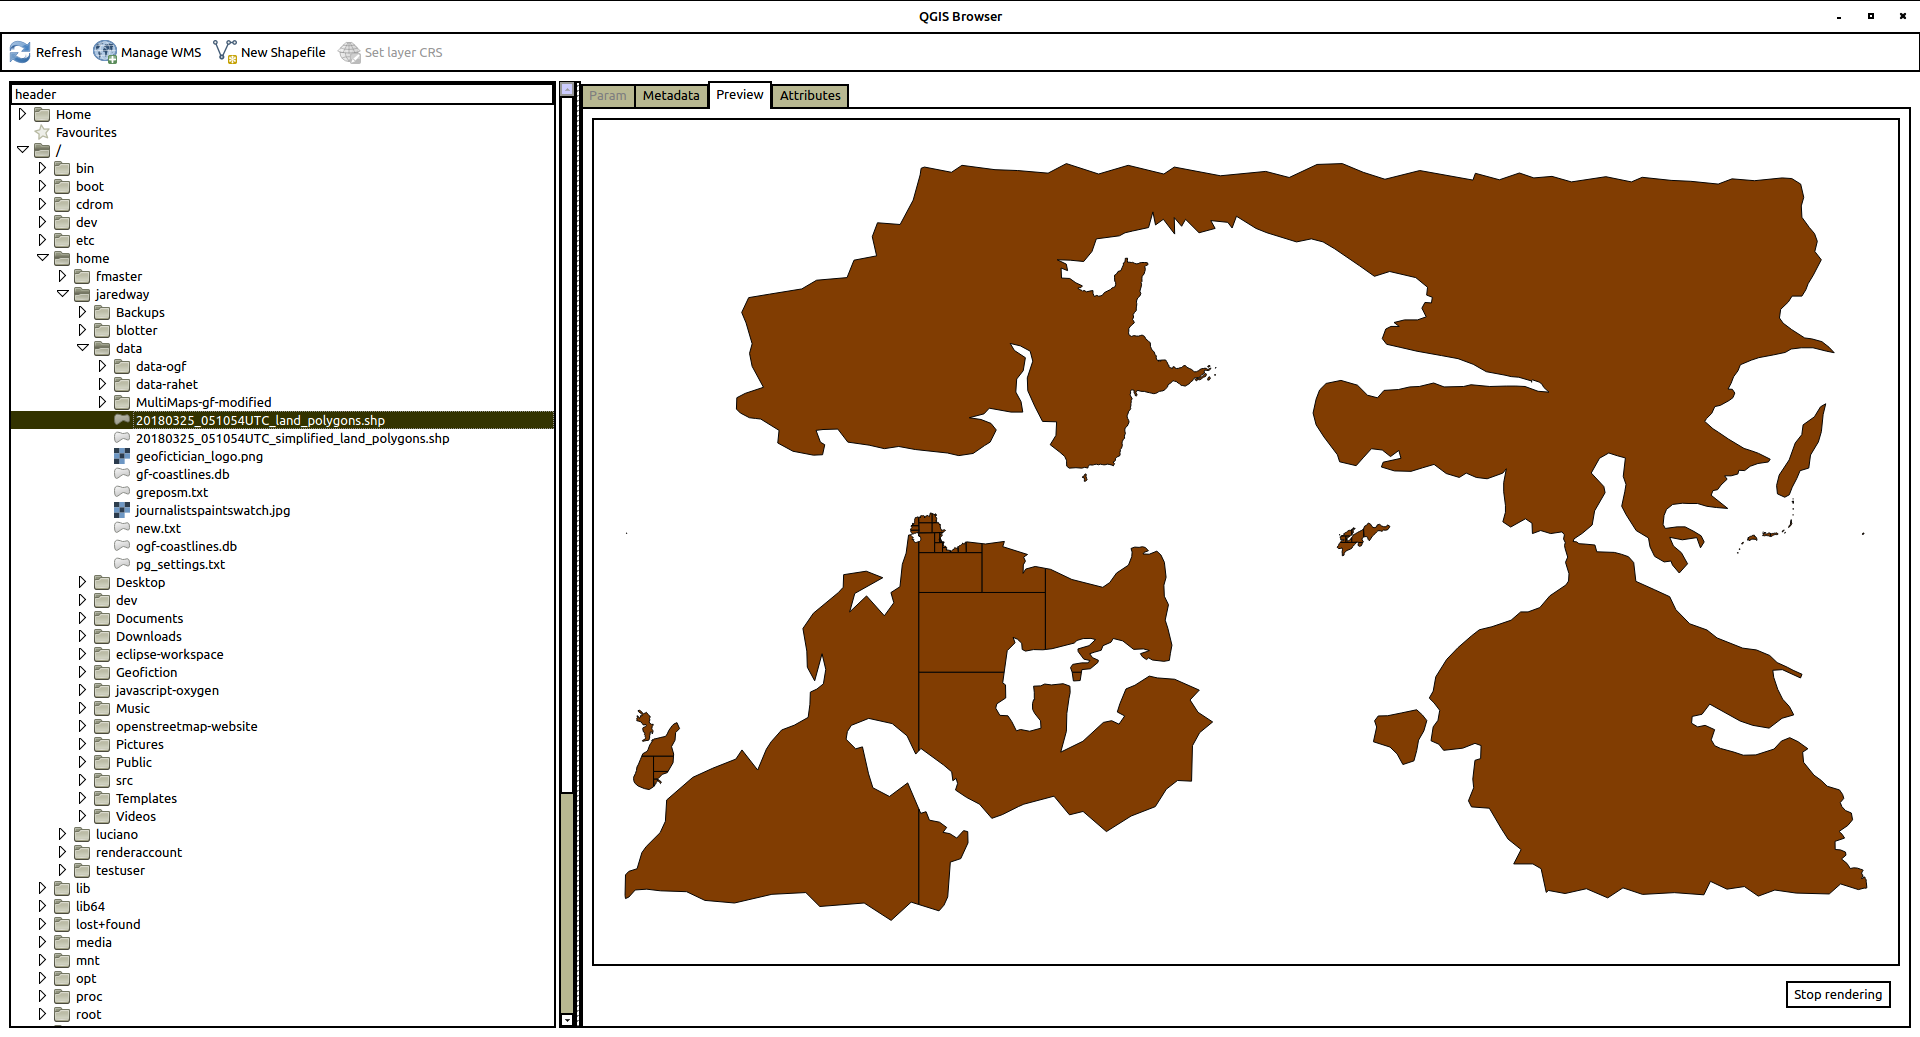
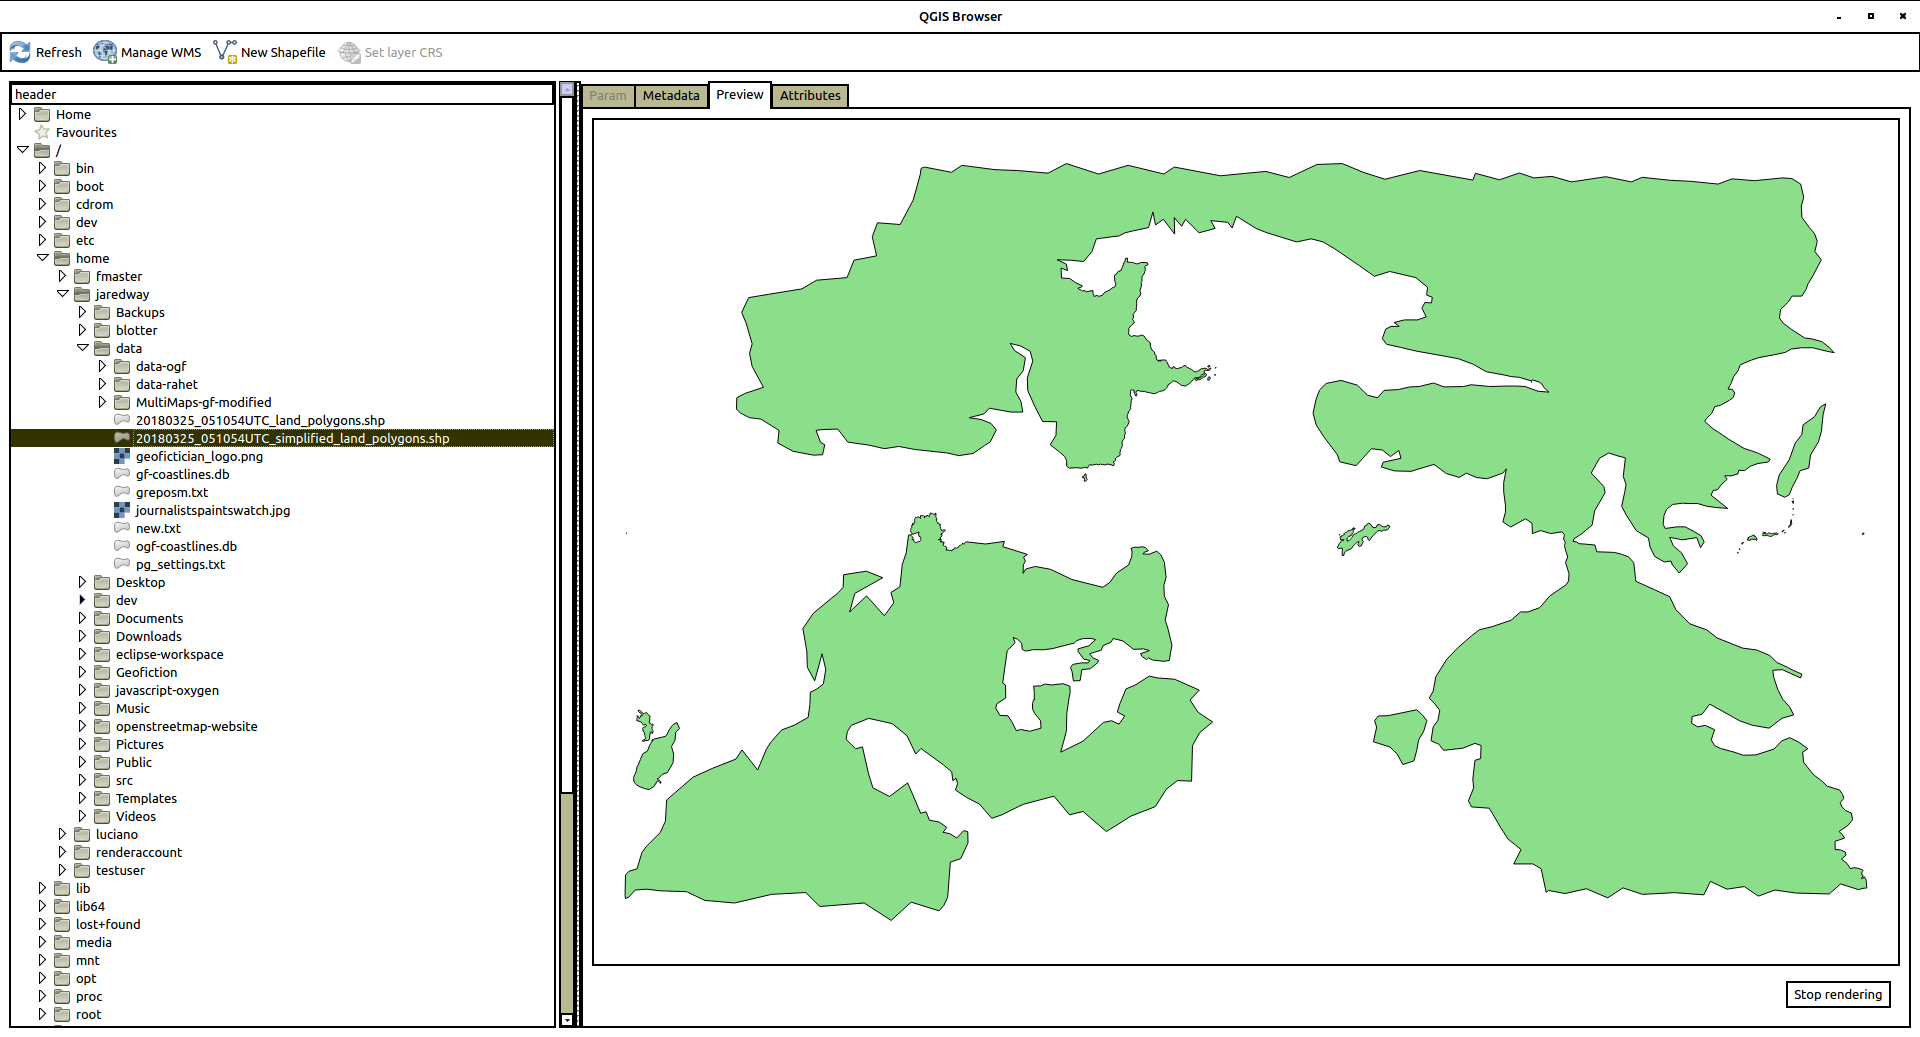
Here are screenshots of each one.

First, land_polygons.shp

picture

And here is simplified_land_polygons.shp

picture

The structure is pretty straightforward, but – how do I make these? Where do they come from? – aside from the non-useful explanation found most places, which is that “OpenStreetMap generates them from the data”.

The coastline problem

The way that the shapefiles are generated for OpenStreetMap are not well documented. But after looking around, I found a tool on github (a software code-sharing site) developed by one of the OpenStreetMap gods, Jochen Topf. It is called osmcoastline, which seemed to be the right way to proceed. I imagined (though I don’t actually know this) that this is what’s being used on the OpenStreetMap website to generate these shapefiles.

The first thing I had to do was get the osmcoastline tool working, which was not trivial, because apparently a lot of its components and prerequisites are not in their most up-to-date or compatible versions in the Ubuntu default repositories.

So for many of the most important parts, I needed to download each chunk of source code and compile them, one by one. Here is the detailed breakdown (in case someone is trying to find how to do this).

Installing osmcoastline

I followed the instructions on the github site (https://github.com/osmcode/osmcoastline), but had to compile my own version of things more than that site implied was necessary. Note that there are other prerequisites not listed below here, like git, which can be gotten via standard repositories, e.g. using apt-get on Ubuntu. What follows took about a day to figure out, with many false starts and incompatible installs, uninstalls, re-installs, as I figured out which things needed up-to-date versions and which could use the repository versions.

I have a directory called src on my user home directory on my server. So first I went there to do all this work.
cd ~/src

I added these utilities:
sudo apt-get install libboost-program-options-dev libboost-dev libprotobuf-dev protobuf-compiler libosmpbf-dev zlib1g-dev libexpat1-dev cmake libutfcpp-dev zlib1g-dev libgdal1-dev libgeos-dev sqlite3 pandoc

I got the most up-to-date version of libosmium (which did not require compile because it’s just a collections of headers):
git clone https://github.com/osmcode/libosmium.git

Then I had to install protozero (and the repository version seemed incompatible, so I had to go back, uninstall, and compile my own, like this):

Git the files…
git clone https://github.com/mapbox/protozero.git
Then compile it…
cd protozero
mkdir build
cd build
cmake ..
make
ctest
sudo make install

I had to do the same for the osmium toolset:

Git the files…
git clone https://github.com/osmcode/osmium-tool.git
Then compile it…
cd osmium-tool
mkdir build
cd build
cmake ..
make

That takes care of the prerequisites. Installing in the tool itself is the same process, though:

Git the files…
git clone https://github.com/osmcode/osmcoastline.git
Then compile it…
cd osmcoastline
mkdir build
cd build
cmake ..
make

I had to test the osmcoastline tool:
./runtest.sh

Using osmcoastline for OGF data

So now I had to try it out. Bear in mind that each command line below took several hours (even days!) of trial and error before I figured out what I was doing. So what you see looks simple, but it took me a long time to figure out. In each case, after making the shapefile, I would copy it over to my desktop and look at it, using the QGIS browser tool. This helped me get an in intuitive, visual feel of what it was I was creating, and helped me understand the processes better. I’ll put in screenshots of the resulting QGIS Browser shapefile preview.

To start out, I decided to use the OGF (OpenGeofiction) planet file. This was because the shapefiles were clearly being successfully generated on the site, but I didn’t have access to them – so it seemed the right level of challenge to try to replicate the process. It took me a few days to figure it out. Here’s what I found.

Just running the osmcoastline tool in what you might call “regular” mode (but with the right projection!) got me a set of files that looked right. Here’s the command line invocation I used:
YOUR-PATH/src/osmcoastline/build/src/osmcoastline --verbose --srs=3857 --overwrite --output-lines --output-polygons=both --output-rings --output-database "YOUR-PATH/data/ogf-coastlines-split.db" "YOUR-PATH/data/ogf-planet.osm.pbf"

Then you turn the mini self-contained database file into a shapefile set using a utility called ogr2ogr (I guess part of osmium?):
ogr2ogr -f "ESRI Shapefile" land_polygons.shp ogf-coastlines-split.db land_polygons

This gives a set of four files
land_polygons.dbf
land_polygons.prj
land_polygons.shp
land_polygons.shx

Here is a view of the .shp file in the QGIS Browser. Looks good.

picture

I copied these files into the /openstreetmap-carto/data/land-polygons-split-3857/ directory, and I tried to run renderd. This alone doesn’t show the expected “ghost” of the OGF continenents, though. Clearly the simplified_land_polygons.shp are also needed.

So now I experimented, and finally got something “simplified” by running the following command line invocation (note setting of –max-points=0, which apparently prevents the fractal-like subdivision of complex shapes – technically this is not really “simplified” but the end result seemed to satisfy the osm-carto requirements):
YOUR-PATH/src/osmcoastline/build/src/osmcoastline --verbose --srs=3857 --overwrite --output-lines --output-rings --max-points=0 --output-database "YOUR-PATH/data/ogf-coastlines-unsplit.db" "YOUR-PATH/data/ogf-planet.osm.pbf"

Again, make the database file into shapefiles:
ogr2ogr -f "ESRI Shapefile" simplified_land_polygons.shp ogf-coastlines-unsplit.db land_polygons

This gives another set of four files
simplified_land_polygons.dbf
simplified_land_polygons.prj
simplified_land_polygons.shp
simplified_land_polygons.shx

And this .shp looks like this:

picture

Now when I copied these files to the /openstreetmap-carto/data/simplified-land-polygons-complete-3857/ directory, and re-ran renderd, I got a successful ghosting of the continents in the render (no screenshot, sorry, I forgot to take one).

Using osmcoastline for my own data

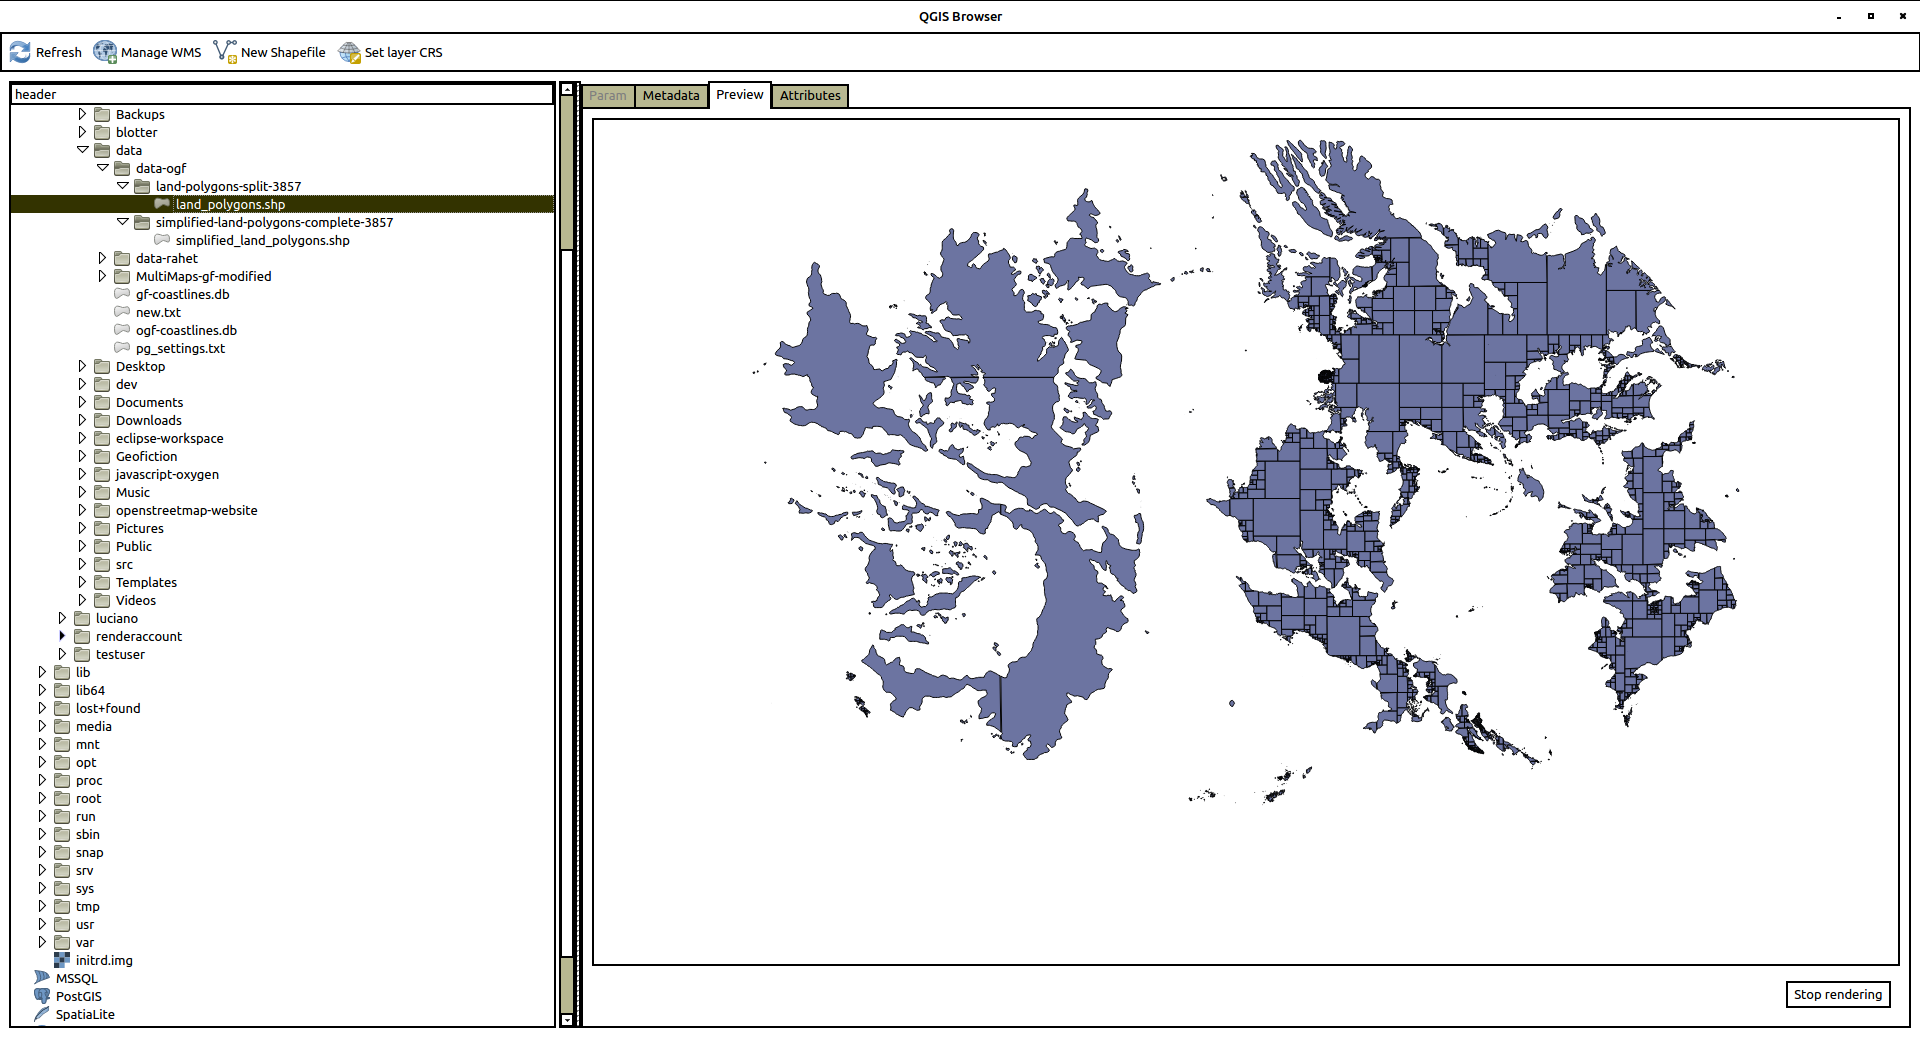
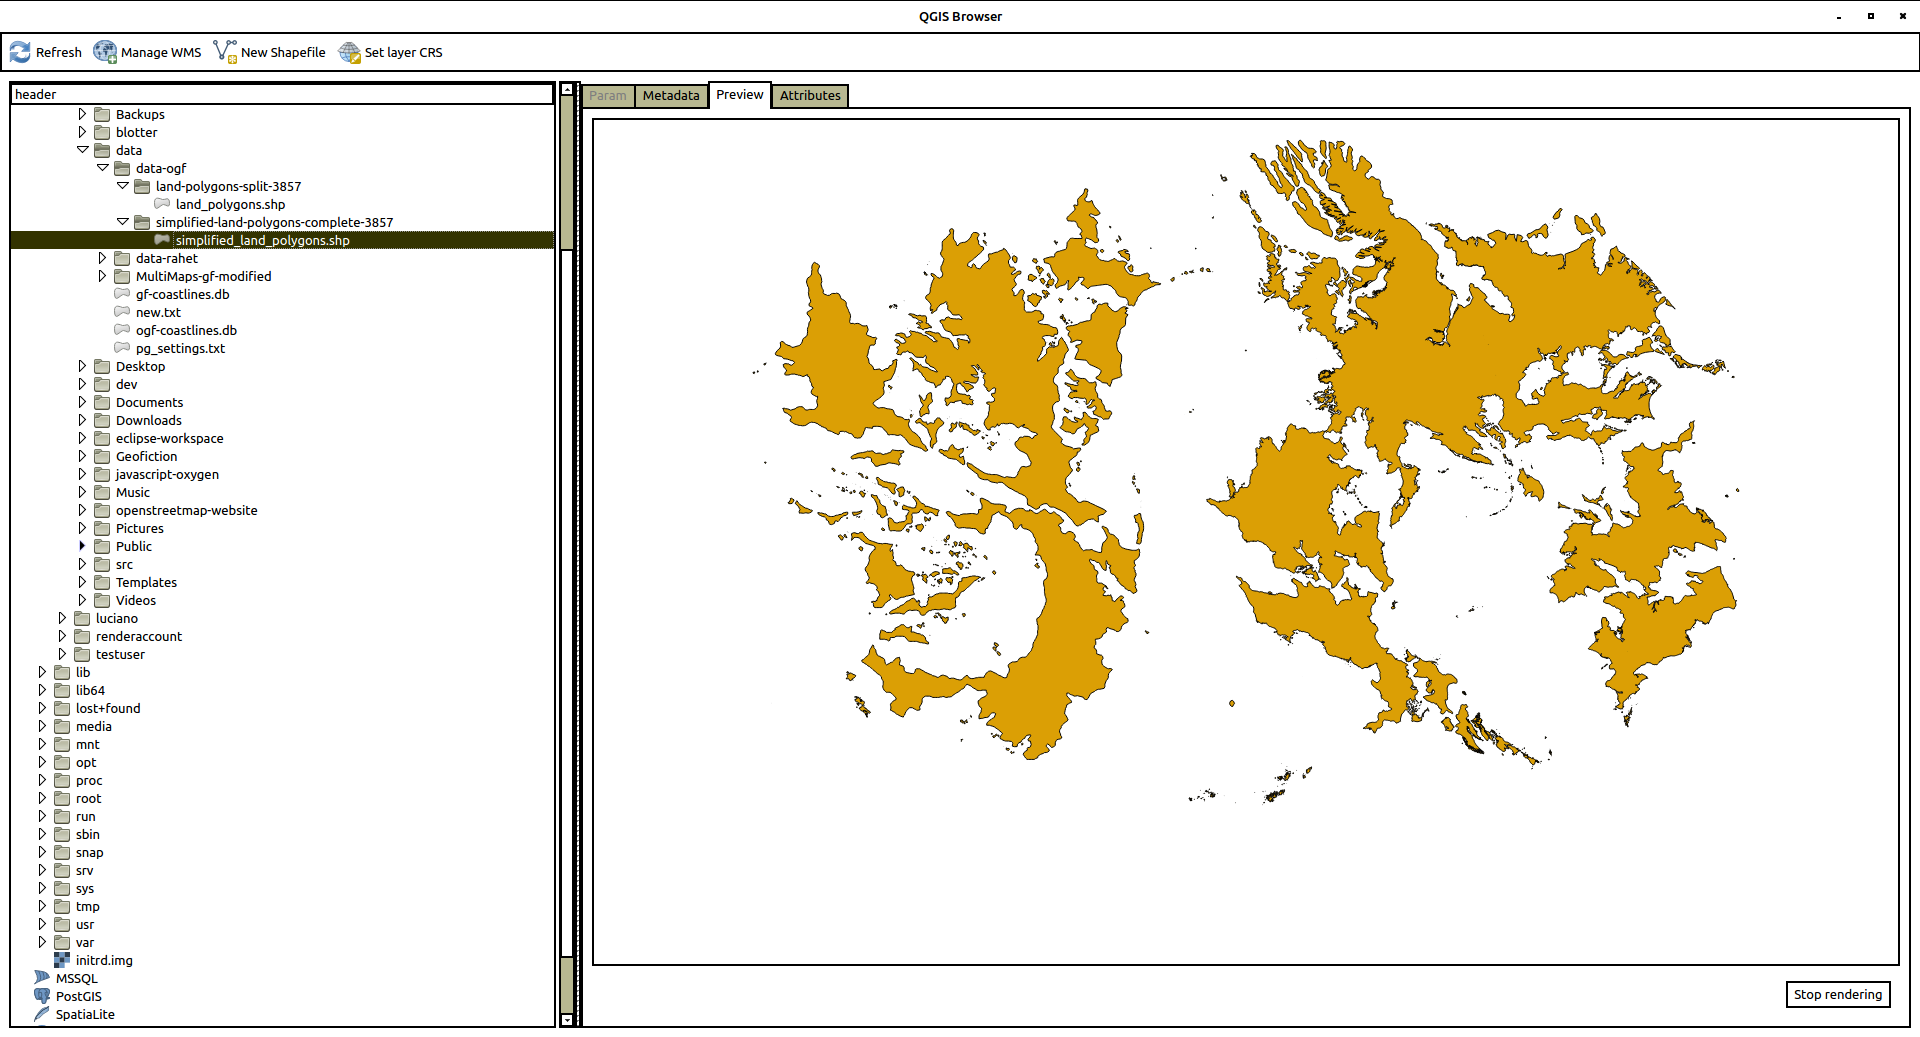
Now I simply repeated the above, in every respect, but substituing my own rahet-planet.osm.pbf file for the ogf-planet.osm.pbf file above. I got the following shapefiles:

land_polygons.shp

picture

simplified_land_polygons.shp

picture

And these, copied to the appropriate osm-carto data directory locations, gives me the beautiful render you see now. [EDIT: Note that the view below of the Rahet planet is “live”, and therefore doesn’t match what shows in the screenshots above. I have moved in a different concept with my planet, and thus I have erased most of the continents and added different ones, and the planet is now called Arhet.]

I actually suspect this way that I did it is not the completely “right” way to do things. My main objective was to give the osm-carto shapefiles it would find satisfactory – it was not to try to reverse-engineer the actual OSM or OGF “coastline” processes.

There may be something kludgey about using the output of the second coastline run in the above two instances as the “simplified” shapefile, and this kludge might break if the Rahet or OGF planet coastlines were more complex, as they are for “Real Earth.” But I’ll save that problem for a future day.

A more immediate shapefile-based project would be to build north and south pole icecaps for Rahet, in parallel with the “Real Earth” Antarctic icesheets that I disabled for the current set-up. You can see where the icecaps belong – they are both sea-basins for the planet Rahet, but they are filled with glacial ice, cf. Antarctica’s probably below-sea-level central basin. And the planet Mahhal (my other planet) will require immense ice caps on both poles, down to about 45° latitude, since the planet is much colder than Earth or Rahet (tropical Mahhal has a climate similar to Alaska or Norway).

Happy mapping.

Music to map by: Café Tacuba, “El Borrego.”

Progress Made!

[Update 20180923: continued from here]

The OSM “Rails Port” is now running on my server, and I have successfully connected to the api via JOSM and rebuilt my test-version of my planet, Rahet.

It took me an entire week of googling and meditating before I solved the port problem. Ultimately, I was looking in the wrong place for clear documentation about it – I was hoping someone would write about it from the perspective of Rails, but finally I found the documentation that made it possible on the Passenger website, buried in an example. There’s a line that belongs in the apache config file, “PassengerRuby /usr/bin/ruby2.3” (or whatever version).

And that made all the difference.

Here’s the link: MAP. [UPDATE 20210530: that link is broken – the test server is closed down. I am running a “live” planet for multiple users based on this original, at arhet.rent-a-planet.com]

So now you can look around. It’s just the “out-of-the-box” OpenStreetMap website (AKA Rails Port), with some minimal customization where I could find where to do it easily. I’ll continue working on that. I might actually disable the iD and Potlatch editing tools – I always use JOSM, and if it ever reaches a point where I’m allowing or inviting others to edit, I would make JOSM-use a prerequisite, I’m certain. JOSM, with its steep learning curve, seems like it would be a good way to “filter” people on the question of how serious they’re taking a project.

There are a number of features that don’t work. I would like to figure out a way to disable the user sign-up page. That’s a kind of vulnerability for the types of use I’m intending for this set-up. Meanwhile, I’ve disabled in a rather inelegant way by “breaking” the sign-up page (by changing its name inside the appropriate folder on the app/views/user path).

I’m happy.

I’ll write up how I figured out the coastline problem, tomorrow, and begin working on deciding what features to retain versus which to change in the Rails Port (i.e. think about customization).

[Update 20180923: continues here]

Music to map by: Run The Jewels, “Talk To Me.”

Not making progress

I wanted to post a part 2 for my last post, about how I got the tileserver working. I was going to talk about coastlines. In fact, my tileserver IS working, but it feels a bit useless without the other half: the so-called Rails Port.

So I have become obsessed with trying to get the Rails Port running. And I keep running into problems. The fundamental problem is that I have never used Ruby (and/or “Ruby on Rails”) before. I don’t really understand it. It’s not a development environment I have any comfort with at all. I don’t really even get the overall model.

I can get a local version of the generic “openstreetmap-website” code running on port 3000 on my desktop. And I can get a similar “development” version running on my server. But I don’t know all the places I need to edit to get the Rails Port to “look at” my tile server and not the default OSM tileservers. And I don’t know what other files I need to customize to control e.g. users, site security, name presentation, etc.

I think I’m going to have to take a timeout on trying to set this up, and spend some time learning how to deploy a much simpler Ruby app on my server.

One bit that seems like it should be utterly trivial is how to get the application to present on port 80 (standard webpage) instead of port 3000 (Ruby’s default development port, I guess). I have installed Passenger for Apache and that’s how I can present the application on port 3000, but I guess Rails doesn’t cohabit well with other applications on Apache – e.g. the wiki, this blog, etc. So somehow… it has to get “wrapped” or “proxied” but the details of how to configure this are beyond my expertise.

I’m frustrated, so I’m going to take a break from this server stuff.

Music to map by: 박경애 – 곡예사의 첫사랑

A more technical summary of how I built my tileserver – part 1

I thought I should put a discussion of how I did this, with much more detail, as I am sure there are other people out there in the world who might want to do something similar.

This is part 1. I’ll post part 2 later.

Background

I wanted to be able to serve Openstreetmap-style map tiles of my own fictional planet, in the same way that the site OpenGeofiction does, but using my own data set.

This process of building a tileserver is separate from the job of setting up an Openstreetmap-style apidb database to be able to edit the data set using tools such as iD, Potlatch, or JOSM. I’m still working on that.

Platform and Preliminaries

I deliberately set up my server on Ubuntu 16.04 (a flavor of Debian Linux) because I knew that OpenGeofiction runs in this environment. I’m not actually sure, but I assume Openstreetmap does too, though, given its scale, that may not be exactly the case, anymore – more likely it’s got a kind of customized, clustered Linux fork that has some genetic relationship to Ubuntu.

I thought it would therefore be easier to replicate the OpenGeofiction application stack.

Before starting this work, I had already installed MySQL and Apache and Mediawiki – except for Apache, however, these are not relevant to setting up a tileserver.

I had also already set up PostgreSQL (the preferred Openstreetmap database server), so the preliminary mentions of setting up this application were skipped.

Finally, using Apache’s sites-available config files and DNS, I had set up a subdomain on my server, tile.geofictician.net, to be the “outside address” for my tileserver. This will hopefully mean that if I ever decide to separate my tileserver from other things running on the same server, it will be somewhat easier to do.

S2OMBaTS with Deviations

Starting out, I mostly followed the steps and documentation at switch2osm.org’s detailed tutorial, here. Below, I refer to this page as S2OMBaTS (“switch2osm manually building a tile server”).

So I don’t see any need to repeat everything it says there. I just followed the steps given on that webpage exactly and religiously. What I’ll document are only the spots where I had to do something differently. These are my “deviations.”

  1. Where S2OMBaTS suggests creating a ‘renderaccount’ on the server to own all the tileserver-related directories and tools, I used my non-root regular username. I’m not sure this is good practice, and if I were setting something up as a “production” environment, I’d be more careful to segregate ownership of this collection of files, applications and services.
  2. There are some problems with authenticating a non-root user for PostgresSQL (‘root’ being the infamous ‘postgres’ superuser). I had to edit the /etc/postgresql/9.5/main/pg_hba.conf file so that the authentication method was “trust”[css]
    # Database administrative login by Unix domain socket
    local all postgres trust

    # TYPE DATABASE USER ADDRESS METHOD

    # “local” is for Unix domain socket connections only
    local all all trust
    [/css]

    I think this might be a bad solution from a security standpoint, but it’s the only one I could find that I understood and could get to work. PostgreSQL security is weird, to me. My DBA experience was entirely with SQLServer and Oracle, back in the day, and those databases’ security are integrated to OS security more tightly, I think. Similarly, MySQL seems to assume linkages between system users and database users, so security for the matched pairs of users are linked. But it seems like PostgreSQL doesn’t work that way.

  3. Where S2OMBaTS suggests using the URI=/hot/ in the /usr/local/etc/renderd.conf file (which seems intended to hijack other applications’ support for the already-existing “HOT” – Humanitarian Openstreetmap Team – layer). I used URI=/h/ instead, which was entirely arbitrary and I could just as easily have used something more meaningful, as at OpenGeofiction, with e.g. URI=/osmcarto/.
  4. To test my installation, of course, I had to load some test data. S2OMBaTS uses a geofabrik snapshot of Azerbaijan. I decided just for the sake of familiarity, to use a snapshot of South Korea. I had to spend quite a bit of time researching and tweaking the individual osm2pgsql options (parameters) to get it to run on my itty-bitty server, even for a fairly small dataset like South Korea’s OSM snapshot, so here’s the osm2pgsql invokation I used to load the data (YMMV).
    osm2pgsql --database gis --create --slim  --multi-geometry --keep-coastlines --hstore --verbose --tag-transform-script ~/src/openstreetmap-carto/openstreetmap-carto.lua --cache 2500 --cache-strategy optimized --number-processes 1 --style ~/src/openstreetmap-carto/openstreetmap-carto.style ~/data/south-korea-latest.osm.pbf
    

At this point, I reached the end of the S2OMBaTS tutorial.

Loading my own planet

I then had to customize things to load my own planet instead of a largely “naked earth” with South Korea well-mapped. The first step was easy enough. I just replaced the South Korea pbf extract with a pbf of my own planet, and re-ran the osm2pgsql step. I got the pbf extract of my planet by working with some kludges and with JOSM on my desktop machine. It was a “simplified” planet – just the continent outlines, a few cities, two countries with their admin_level=2 boundaries, and one tiny outlying island with lots of detail, which I borrowed from my city-state Tárrases at OpenGeofiction. It was composed as a kind of “test-planet” to keep things simple but hopefully test most of what I wanted to achieve in my tileserver.

Here’s the load script for that (essentially the same as used for South Korea, above).

osm2pgsql --database gis --create --slim  --multi-geometry --keep-coastlines --hstore --verbose --tag-transform-script ~/src/openstreetmap-carto/openstreetmap-carto.lua --cache 2500 --cache-strategy optimized --number-processes 1 --style ~/src/openstreetmap-carto/openstreetmap-carto.style ~/data/gf-planet.osm.pbf

The problem, of course, is that if you run the render at this point, you get all the features of the new planet, but the continent outlines and the land-water distinction is “inherited” from earth. That’s because the mapnik style being used is referencing the shapefiles produced by and downloaded from Openstreetmap. The creators of the Openstreetmap software, including the OSM carto style, didn’t take into account the possibility that someone would try to use their software to show a map of somewhere that wasn’t planet Earth, and consequently, these need for these shapefiles is “hardcoded.” So the “Earth” shapefiles have to be substituted by alternate shapefiles extracted from the alternate planet dataset.

Customizing Coastlines and Shapefile Hell

This was the hardest part for me. It took me more than a week to figure it all out. I’m not experienced with shapefiles, and don’t really understand them, and the process by which shapefiles get extracted from the OSM global dataset in a format that can be used by the openstreetmap-carto mapnik style is very poorly documented, online. So it was a lot of google-fu and experimentation, and downloading QGIS and teaching myself a bit about shapefiles, before I could get things working. It’s not clear to me that I really did it the right way. All I can say is that it seems to work.

The first steps I took were to try to simplify my task. I did this by chasing down the shapefile dependencies in the mapnik style sheet, and manually removing the ones that seemed less important. I did this mostly through trial and error.

The only file that needs to be edited to accomplish this simplification is the main mapnik xml file: <YOUR-PATH>/openstreetmap-carto/mapnik.xml. Bear in mind, though, that this file is the output of the carto engine (or whatever it’s called). By editing it, I have “broken” it – I won’t be able to upgrade my OSM carto style easily. But this is just a test run, right? I just wanted to get it to work.

So I edited the <YOUR-PATH>/openstreetmap-carto/mapnik.xml file and deleted some stuff. You have to be comfortable just going in and hacking around the giant xml file – just remember to only delete things at the same branch level of the tree structure so you don’t end up breaking the tree.

I removed the <Style></Style> sections that mentioned Antarctic icesheets – there were two. As things stand, my planet has no Antarctic icesheets, so why try to incorporate shapefiles supporting them?

Then, I eliminated the<Style></Style> section mentioning the <YOUR-PATH>/openstreetmap-carto/data/ne_110m_admin_0_boundary_lines_land directory, since these are land-boundaries for Earthly nations. I figured if I couldn’t see land-boundaries for my planet’s nations at low zooms, it would be no big deal. It’s not clear to me that this has been implemented on OpenGeofiction, either.

I also discovered that in fact, this file doesn’t even point to the <YOUR-PATH>/openstreetmap-carto/data/world_boundaries directory. So there was no need to worry about that one.

So that left me with two shapefiles I had to recreate for my own planet’s data:
<YOUR-PATH>/openstreetmap-carto/data/land-polygons-split-3857/land_polygons.shp and <YOUR-PATH>/openstreetmap-carto/data/simplified-land-polygons-complete-3857/simplified_land_polygons.shp.

Let’s just summarize by saying that this is what took so long. I had to figure out how to create shapefiles that the mapnik style would know what to do with, so that my continents would appear on the render. It took a lot of trial and error, but I’ll document what’s working for me, so far.

*** To be continued ***

[Update 20180923: Continues here]

Music to map by: Héctor Acosta, “Tu Veneno.”

Testing the leaflet widget on the blog

Here’s a live leaflet of my own tileserver with my own planet (stripped of detail because I want my database small as I test things). Welcome to Rahet. UPDATE, OCTOBER 2019: Being a dynamic window on the map, rather than a snapshot, means that since the “planet” shown is much changed, this view is not the view that existed when this blog post was written.

Here’s a view of Tárrases over at OGF on standard layer.

Here’s a view of Tárrases over at OGF on Topo layer. [UPDATE 20210530: The OGF Topo layer is no longer functioning.] [UPDATE2 20230315: The OGF Topo layer is once again functioning, and has been for over a year.]

That’s pretty cool.

Music to map by: Cold, “Bleed.”

What am I doing!?

A few weeks ago, I decided to just go ahead and try to replicate the “OpenGeofiction Stack” by building my own server.

So I shelled out ₩25000 KRW ($20 USD) a month for a low-end Linux server from one of the many companies that rent out cheap servers. It’s running Ubuntu 16.04.

I happened to have already bought, some years ago, the domain name ‘geofictician.net’, so I attached this name to my server, and I created some subdomains. I applied my moribund artistic skills and sketched up a little logo for the website, too. That’s also on this blog (at upper left). It’s a freehand drawing, but imitating some other images I looked at.

First I loaded the standard LAMP stack (MySQL and Apache), and I then installed mediawiki and configured. I made a kind of “clone” of the OGF wiki. I even uploaded some of the articles I’d deleted from the main site. I managed to get the MultiMaps extension fork that Thilo built running, so I can point those wiki articles at OGF.

The one thing I’m frustrated with, in the wiki, is that the email user utility was impossible to configure to work with my postfix install on the server. Hence, for now, I’ve got the wiki using my gmail account to send emails, which I think isn’t an ideal solution. Then again, it doesn’t really matter, for now, because it’s just me, using the wiki alone.

Anyway, I think I’ll use this wiki to write all the overwikification I’ve felt compelled to refrain from writing on the OGF wiki. Maybe I’ll build a bot and make stubs for ALL of my locales on the map (8000 stubs! Now that’s overwikification).

Next, I started building a tile server. This was pretty complicated, and I don’t consider the task complete. I did manage to upload an OSM file of a planet I started building using JOSM a few years back and that hasn’t ever been “rendered” before, though I’ve been drawing paper maps of parts of this planet since I was in middle school.

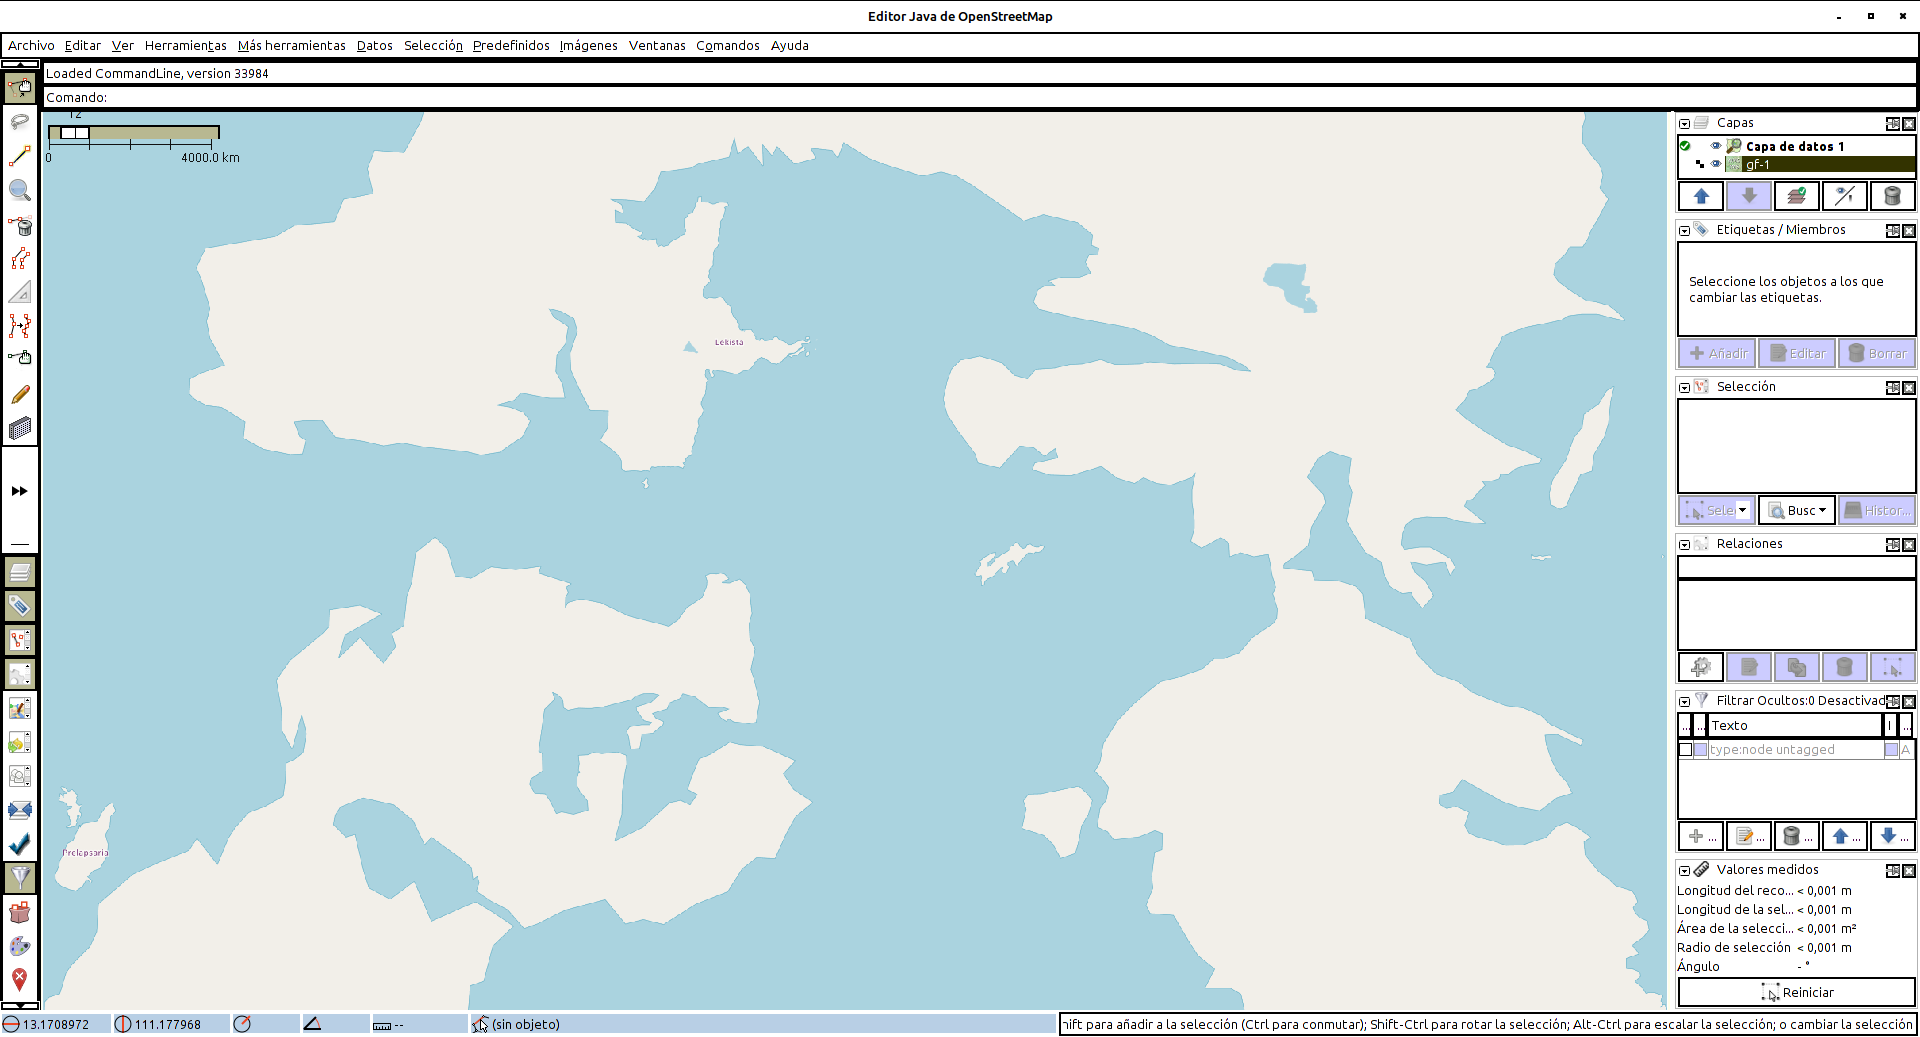
Finally, a few days ago, I was able to test the success of the tile render by connecting to the tileserver using JOSM from desktop. It was quite exciting to see my long-languishing planet, Rahet, rendered in JOSM, if only in the most skeletal of forms:
picture
Earlier today, I installed this blog, using the standard wordpress package, and it went quite smoothly. Good-bye, bliki.

I’m currently working on getting the OSM “Rails Port” up and running. I just ran a test and got some errors, so I’ll have to troubleshoot those. But I feel like the end is in sight.

Music to map by: 마마무, “1cm의 자존심.”