Font Fail

As usual, I have neglected this blog. So what’s been going on?

I have taken some steps to migrate one of my major geofictions – The Ardisphere – from OGF to my self-hosted OGFish clone, Arhet. The reason for this is that OGF seems increasingly rudderless and destined to eventually crash and burn, and I am emulating the proverbial rat on the sinking ship. I still hugely value the community there. But the backups have become unreliable, the topo layer (of which I was one of the main and most expert users) has been indefinitely disabled, and conceptual space for innovation remains unavailable.

One small problem that I’ve run up against in migrating The Ardisphere to Arhet is that I discovered that Korean characters were not being supported correctly by the main Arhet map render, called arhet-carto. This is a problem because the Ardisphere is a multilingual polity, and Korean (dubbed Gohangukian) is one of the major languages in use, second only to the country’s lingua-franca, Spanish (dubbed Castellanese). I spent nearly two days trying to repair this Korean font problem. I think I have been successful. I had to manually re-install the Google noto set of fonts – noto is notorious (get it?) for being the most exhaustive font collection freely available. I don’t get why the original install failed to get everything – I suspect it’s an Ubuntu (linux) package maintenance problem, rather than anything directly related to the render engine (called renderd, and discussed in other, long-ago entries on this sparsely-edited blog).

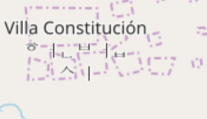
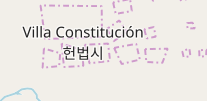
Here (below) are before-and-after screenshot details of a specific city name that showed the problem: Villa Constitución (헌법시) is the capital and largest city in The Ardisphere. Ignore the weird border-artifacts behind the name on these map fragments – the city is in limbo, right now, as I was re-creating it and it got stuck in an unfinished state.

Before – you can see the Korean (hangul) is “scattered”:

picture

After – now the hangul is properly-composited:

picture

You can see The Ardisphere on Arhet here – and note that within the Arhet webpage you can switch layers to OGF and see it there too. Same country, different planets!

Music to fiddle fonts by: Attack Attack! “Brachyura Bombshell”

The Terrible mysql Crash of 2021

I still don’t know how it happened. I somewhat suspect I got hacked, somehow … I found strange and unexpected Chinese IP addresses in my mysql error log. But I don’t understand mysql back end or admin well enough to know for sure what was going on.

I was able to restore a full-server backup to a new server instance, and have re-enabled the mysql-driven websites (my 2 blogs, my wiki, etc.) on the new instance. Meanwhile, I somewhat stupidly reactivated the non-mysql website (the geofictician OSM-style mapping site, the so-called “rails port”) on the old server instance. The consequence of that is that I am now stuck with a two-server configuration where I had a single server configuration before. I think in the long run I’ll want to isolate ALL my mysql-based sites to a single server, and ALL my non-mysql-based sites to another single server. That’s going to take a lot of shuffling things around, which is not trivial.

For now this blog (and my other blog) seems healthy and up-and-running, again.

There may be more downtime ahead as I try to reconfigure things more logically, however.

Music to do sysadmin drudgery by: Talking Heads, “Found A Job.”

Round and round

I’m sorry I neglected this blog for the last two months. It wasn’t because I stopped geofiction activities – I just kind of forgot to update anything here. In fact, I’ve been staying busy with various geofiction projects.

I ran across a small, free website that someone made that transforms a flat map of an imaginary planet into a globe that you can rotate with the mouse or that can be used to generate a “spinning world” gif. It’s called maptoglobe.com.

I decided I wanted to make one for my planet, Arhet – just out of curiosity. This did have a few minor technical challenges. First, I had to “knit” together the tile images for Arhet. I found a nice utility that does this, an application called tile-stitch by Eric Fischer. It can be found on github. Except for one small problem, I just followed the documentation provided on the github README. That one problem: to get it to work in my machine, I needed to modify the code in the stitch.c file to include the full path to the geotiff utilities. So…

Original code:...

#include <geotiffio.h>
#include <xtiffio.h>
...

My version:...

#include </usr/include/geotiff/geotiffio.h>
#include </usr/include/geotiff/xtiffio.h>
...

Once that was set up, I simply extracted the tiles at zoom level 5 from the Arhet2-carto render using the tile-stitch utility, with this command
./stitch -o arhet5.png -- -85.05 -179.99 85.05 179.99 5 https://tiles01.rent-a-planet.com/arhet2-carto/{z}/{x}/{y}.png

That got the whole planet into a square .png file, which I called arhet5.png.

The next problem is that the maptoglobe website requires the map image to be in a equirectangular projection. But the tiles for Arhet are in the modified mercator projection used by almost all online “slippy maps,” classified as EPSG:3857.

So the arhet5.png file was in the wrong projection. I found out I could use another utility that I already had, the gdal library, to do this job. I ran the following commands.
/usr/bin/gdal_translate -of Gtiff -co "tfw=yes" -a_ullr -20037508.3427892 20036051.9193368 20037508.3427892 -20036051.9193368 -a_srs "EPSG:3857" "arhet5.png" "arhet5_tfw.tiff"

/usr/bin/gdalwarp -s_srs EPSG:3857 -t_srs EPSG:4326 -ts 6400 3200 "arhet5_tfw.tiff" "arhet5.tif"

These produced a .tif file in the right projection, 6400 x 3200 pixels. I then opened this file and resaved as .png again (because this is a more compact format that is therefore uploadable to maptoglobe.com – which has a maximum file size limit).

I then uploaded that .png file to the maptoglobe site, and it allowed me to save the resulting “globe” – it’s accessible here. Further, I was able to make this nice little spinning planet gif:

That’s the planet Arhet, as it currently stands – note that most of the mapping there is not my own, but the work of the various other Arhet members who have joined me in my experiment.

That worked out so well that I did the same thing for my own private planet, Rahet (note that the names Arhet and Rahet are obviously related; Rahet came first, and when I decided to change the project and invite other participants, I renamed the old Rahet as Arhet, and then resurrected the old Rahet later and as a separate project again).

Here is a the link for Rahet on the maptoglobe site, and here is the spinning planet gif:

So those are pretty cool. Remember that the original “slippy maps” (HRATEs) of these two projects are on the map portion of this website, here and here.

Music to make HRATEs to: 하선호 (Sandy), “Love Me More”

Messing with Maperitive

For a long time I avoided Maperitive – because when I tried it several years ago it repeatedly crashed my computer. So I thought of it as bad software.

Recently, I decided to give it another try. This is in relation to wanting more tools to be able to develop and understand custom renders, related to my efforts to expand functionality on my own map server.

So just this morning I downloaded Maperitive, got a successful install, and played with it a little bit. I made a google maps style view of my city Ohunkagan.

I tried to make a detailed view of the OGF country called Egani (because my efforts with Maperitive just happened to match up with that mapper’s request for some technical help).

That’s a pretty detailed map – you will have to download and zoom around to see the detail.

Maperitive is powerful, but it’s got a pretty steep learning curve too. I’ll mess with it some more, as it appears to have a stable version that runs on Linux, now.

Here is a map of my village of Goodgrove, on Arhet (my own map server).

Music to view maps by: Muse, “Map of the problematique.”

HRATE

In response to several queries from other geoficticians about how to set up a map server (e.g. Arhet or Ogieff), I decided to consolidate some documentation about how I got Arhet to work. It is here:

http://wiki.geofictician.net/wiki/index.php/HRATE

It is very much a work-in-progress. As I think of information to add, or decide to add more detail, I’ll fill it out. At some point, I’ll be trying to do a “re-build” of the Arhet stack to a new server (for reasons related to the fact that I have other things running on its current server that have a higher need for reliability), and when I do that, it will give me a chance to review and better understand the process.

Music to write documentation by: Erik Satie, “Gnossienne No. 1, 2, 3.”

Git topo

I finally got tired of dealing with Windows 10 drama, and decided to rebuild my preferred Ubuntu Linux desktop, as I’d been using in Korea before moving away last July.

I’ve made good progress on that, and have JOSM up and working again, and all that. But I became aware, as I was migrating my data and files, that I have a lot of files I would rather not lose, especially related to my geofiction. I need some systematic means of keeping stuff backed up.

I handled the issue of backup and redundancy for my creative writing years ago, when I started storing all my drafts and notes in google docs. It’s convenient, too, because I can get to my writing no matter where I am.

But I have no such system for all my .osm files for the geofiction. Especially important are the .osm files I use for drawing the topo layer, since those are never uploaded anywhere except temporarily at the time of an update.

I suppose I could just copy the files. But I decided I needed to store them in some kind of version-controlled space. About two years ago, I’d had them in a git repository but it was just copied out to an extra harddrive. I used git for some other stuff I used to do, so it wasn’t that hard to figure out.

I decided this time to try something different – I made a repository on github and decided to put my topo .osm files there. If I get in the habit of regularly updating the git repository, I’ll always have those topo files, no matter what happens to my computer or where I am. Further, if ever I go in the direction of wanting to collaborate on drawing topo files, this will make it really easy (assuming the other person is up to dealing with checking things out of a git repository). [UPDATE: this was a short-lived effort. Subsequently the files are just files, again, but they live on one of my HRATE servers]

If ever there will be a truly collaborative geofiction “planet” with a master topo layer, this might be a way to maintain that information, since practically speaking it can’t and shouldn’t be uploaded to the map server. Just an experiment, I guess, and meanwhile I’ll have a reliable backup of my work.

Music to map by: 선미, “가시나.

Some weeks…

And then, some weeks, I don’t get much done.

I started working on trying to customize my Rails Port (the main “copy” of the OpenStreetMap slippy map), and got very bogged down in the fact that the OpenStreetMap Rails Port is highly complex software written in a language and using an architecture unfamiliar to me: the infamous “Ruby on Rails.”

I dislike the way that the actual name “OpenStreetMap” is hard-coded throughout all the little modules. It seems like a poor application design practice, especially for an opensource project. One area where the name proliferates is in all the internationalization files. So I started wondering how hard it might be to get all these internationalization files to be more “generic.” The answer: pretty hard, at least for me.

I’ve wandered off down a digressive passage where I’m learning about software internationalization under the Ruby on Rails paradigm, but I’m undecided how I want to handle this. Do I want to try to solve it the “right way”? Or just kludge it (most likely by deleting all the internationalization files except perhaps English, Spanish, and Korean)?

Meanwhile I have also got pulled away by some non-computer, non-geofiction projects.

So… not much to report, this week – nothing mapped, nothing coded, nothing configured.

Music to map by: Sergei Rachmaninoff, “Piano Concerto No. 2.”

A more technical summary of how I built my tileserver – part 2

[Update 20180923: continues from here]

The objective

I started discussing the coastline shapefile problem in first post.

Early on, I found the tool called QGIS Browser and installed it on my desktop. I used this to examine the shapefiles I was creating.

The first step was to look at the “real Earth” OpenStreetMap-provided shapefiles I was trying to emulate – the two mentioned in my previous post:
/openstreetmap-carto/data/land-polygons-split-3857/land_polygons.shp
and
/openstreetmap-carto/data/simplified-land-polygons-complete-3857/simplified_land_polygons.shp

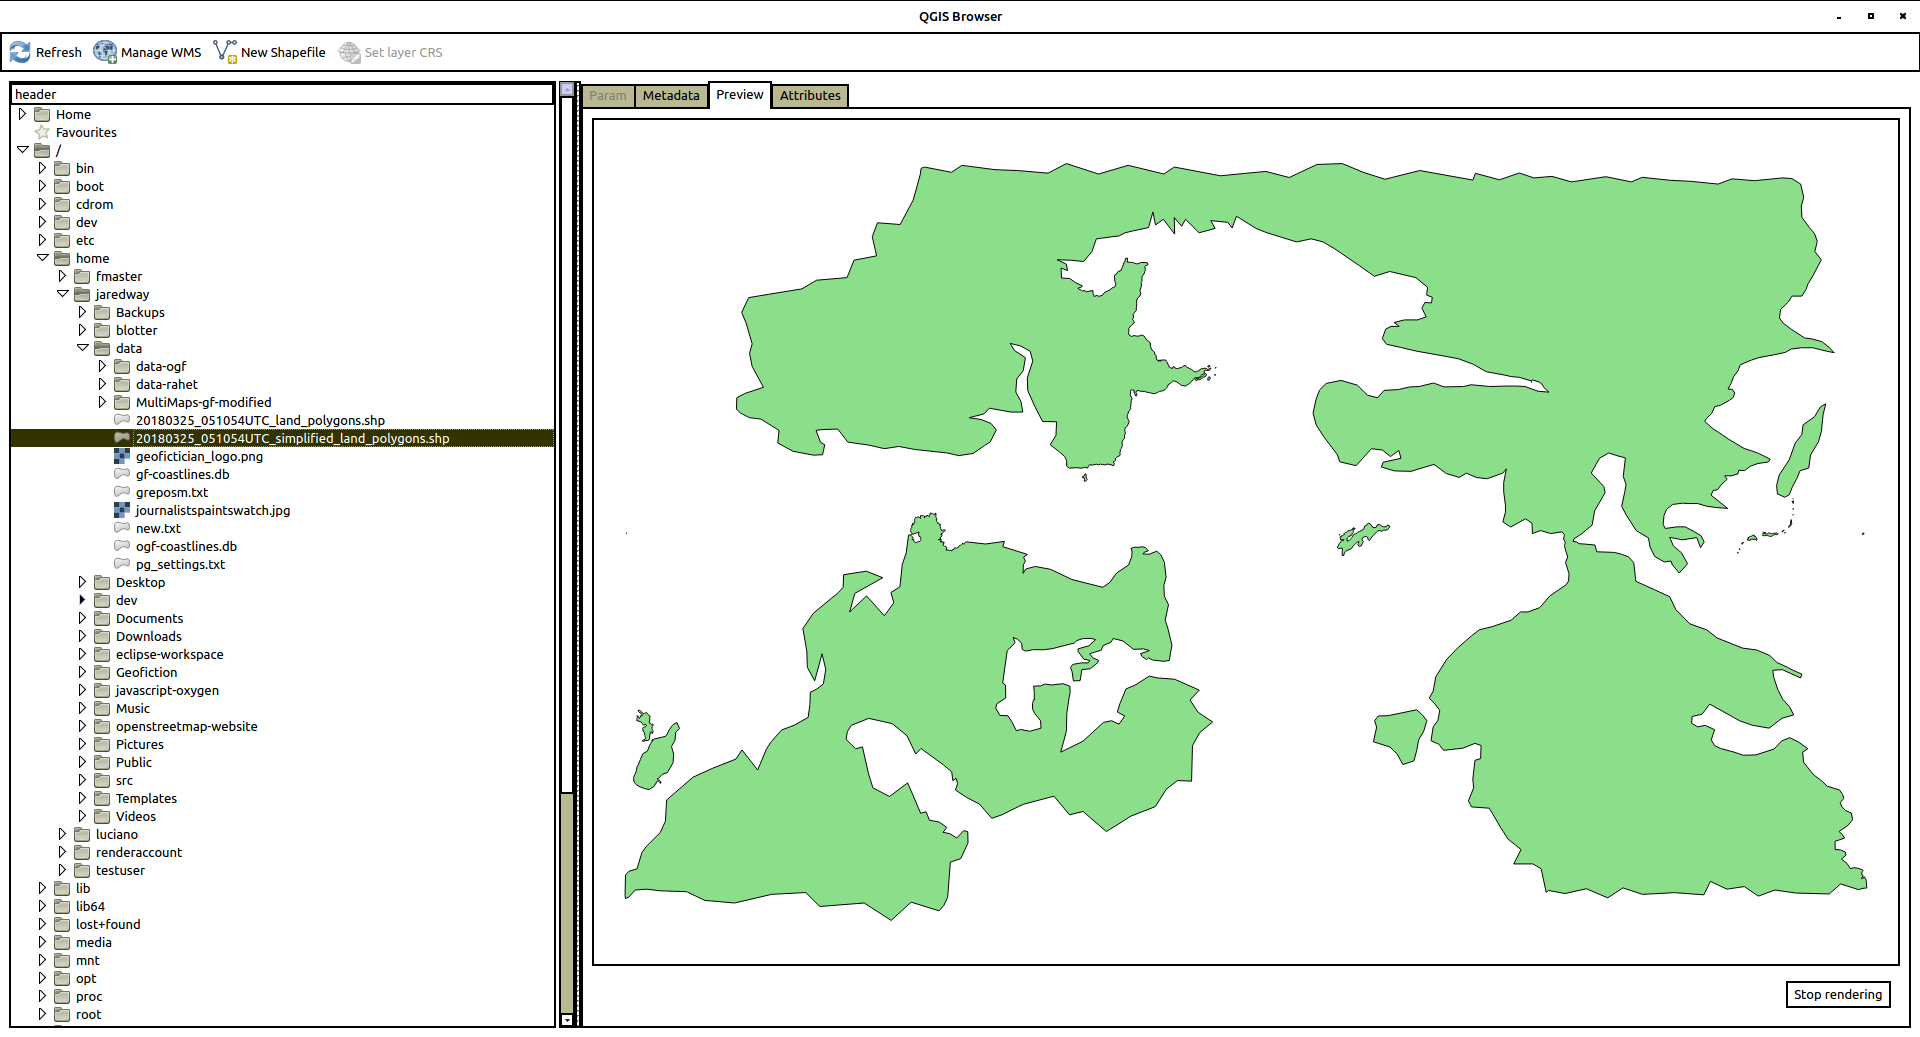
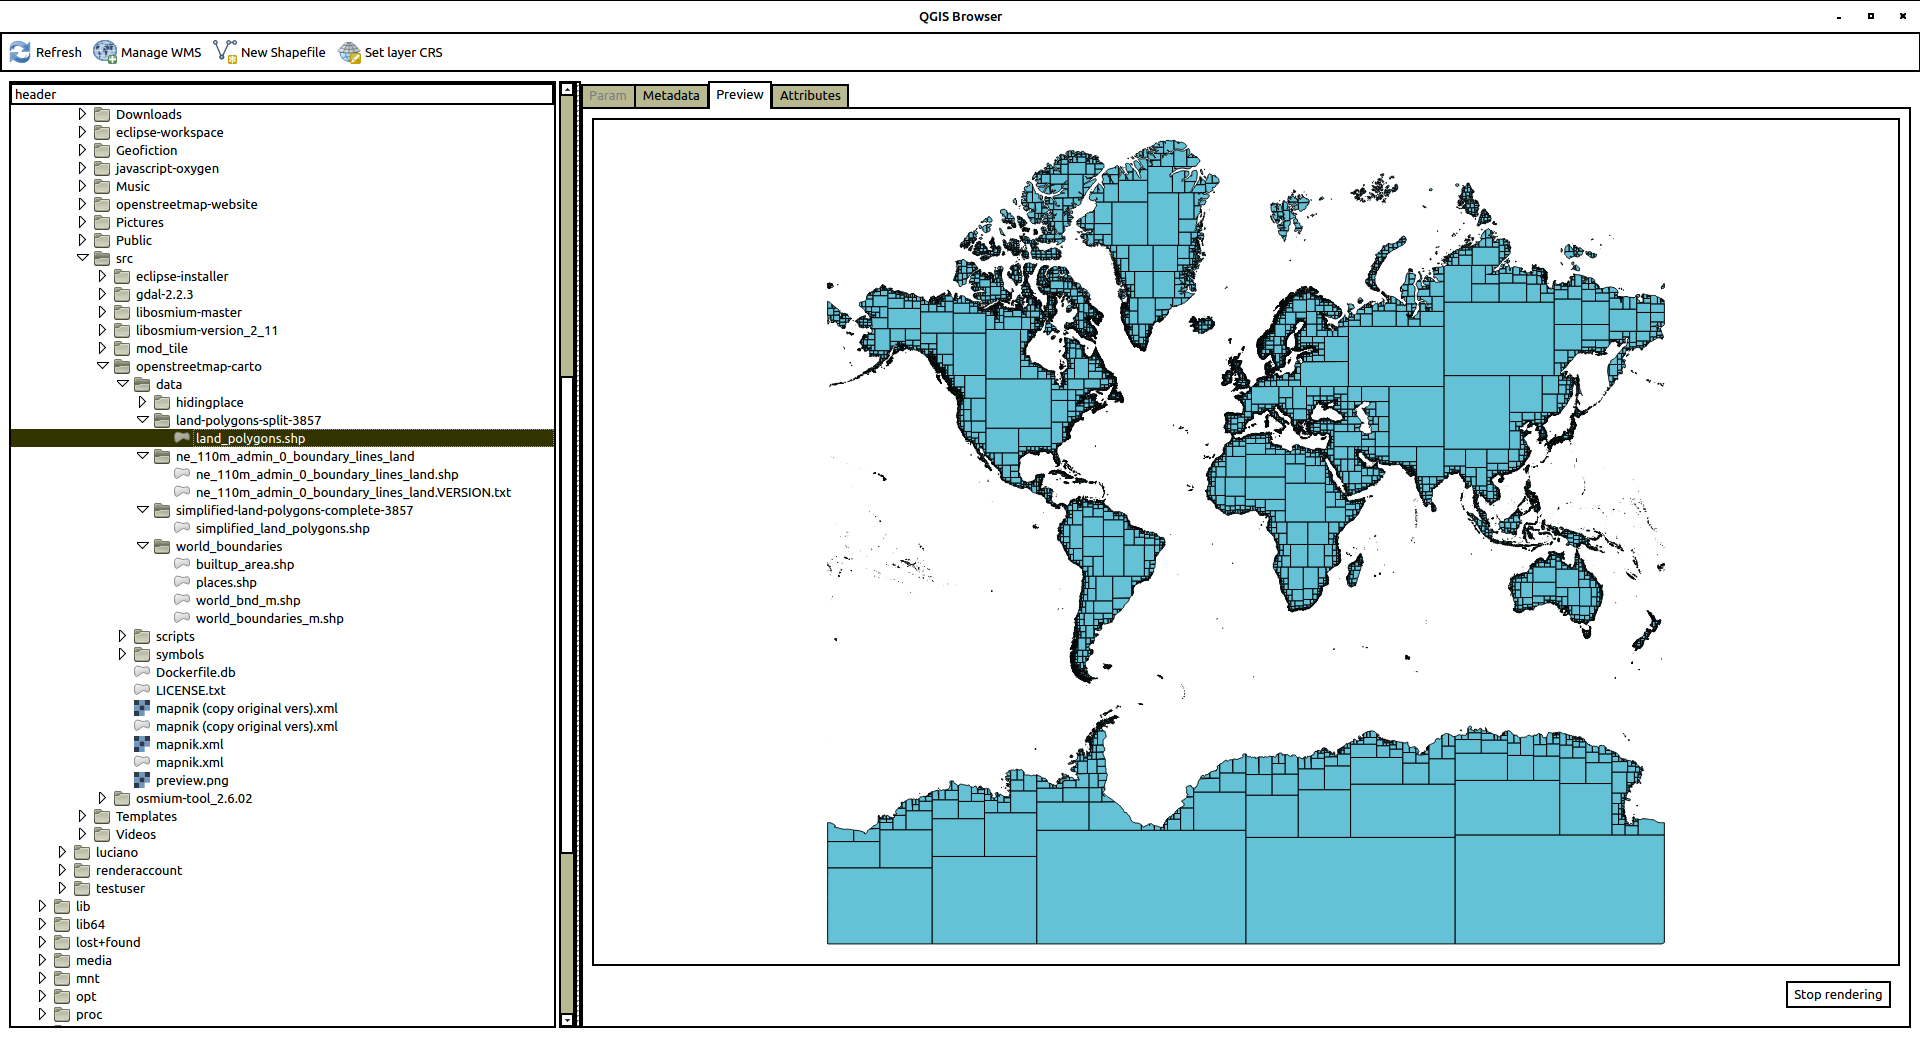
Here are screenshots of each one.

First, land_polygons.shp
picture

And here is simplified_land_polygons.shp
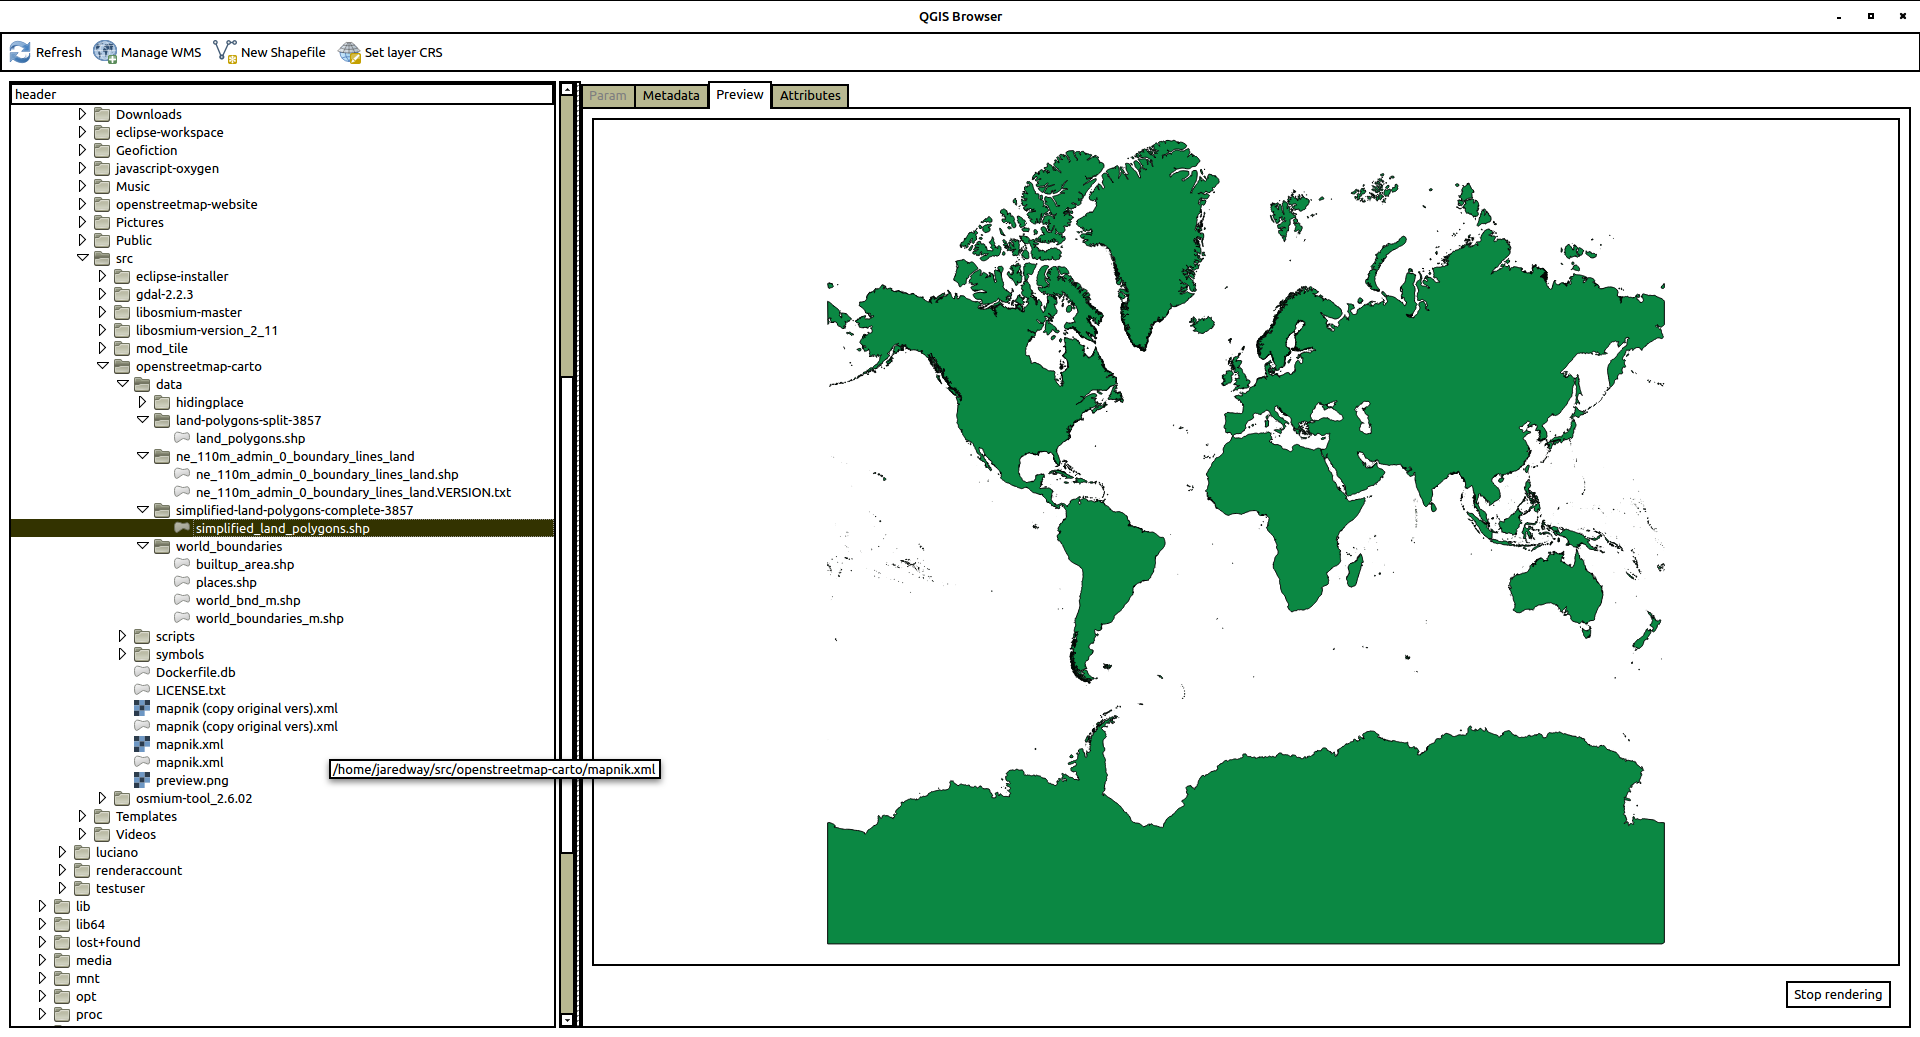
picture

The structure is pretty straightforward, but – how do I make these? Where do they come from? – aside from the non-useful explanation found most places, which is that “OpenStreetMap generates them from the data”.

The coastline problem

The way that the shapefiles are generated for OpenStreetMap are not well documented. But after looking around, I found a tool on github (a software code-sharing site) developed by one of the OpenStreetMap gods, Jochen Topf. It is called osmcoastline, which seemed to be the right way to proceed. I imagined (though I don’t actually know this) that this is what’s being used on the OpenStreetMap website to generate these shapefiles.

The first thing I had to do was get the osmcoastline tool working, which was not trivial, because apparently a lot of its components and prerequisites are not in their most up-to-date or compatible versions in the Ubuntu default repositories.

So for many of the most important parts, I needed to download each chunk of source code and compile them, one by one. Here is the detailed breakdown (in case someone is trying to find how to do this).

Installing osmcoastline

I followed the instructions on the github site (https://github.com/osmcode/osmcoastline), but had to compile my own version of things more than that site implied was necessary. Note that there are other prerequisites not listed below here, like git, which can be gotten via standard repositories, e.g. using apt-get on Ubuntu. What follows took about a day to figure out, with many false starts and incompatible installs, uninstalls, re-installs, as I figured out which things needed up-to-date versions and which could use the repository versions.

I have a directory called src on my user home directory on my server. So first I went there to do all this work.
cd ~/src

I added these utilities:
sudo apt-get install libboost-program-options-dev libboost-dev libprotobuf-dev protobuf-compiler libosmpbf-dev zlib1g-dev libexpat1-dev cmake libutfcpp-dev zlib1g-dev libgdal1-dev libgeos-dev sqlite3 pandoc

I got the most up-to-date version of libosmium (which did not require compile because it’s just a collections of headers):
git clone https://github.com/osmcode/libosmium.git

Then I had to install protozero (and the repository version seemed incompatible, so I had to go back, uninstall, and compile my own, like this):

Git the files…
git clone https://github.com/mapbox/protozero.git
Then compile it…
cd protozero
mkdir build
cd build
cmake ..
make
ctest
sudo make install

I had to do the same for the osmium toolset:

Git the files…
git clone https://github.com/osmcode/osmium-tool.git
Then compile it…
cd osmium-tool
mkdir build
cd build
cmake ..
make

That takes care of the prerequisites. Installing in the tool itself is the same process, though:

Git the files…
git clone https://github.com/osmcode/osmcoastline.git
Then compile it…
cd osmcoastline
mkdir build
cd build
cmake ..
make

I had to test the osmcoastline tool:
./runtest.sh

Using osmcoastline for OGF data

So now I had to try it out. Bear in mind that each command line below took several hours (even days!) of trial and error before I figured out what I was doing. So what you see looks simple, but it took me a long time to figure out. In each case, after making the shapefile, I would copy it over to my desktop and look at it, using the QGIS browser tool. This helped me get an in intuitive, visual feel of what it was I was creating, and helped me understand the processes better. I’ll put in screenshots of the resulting QGIS Browser shapefile preview.

To start out, I decided to use the OGF (OpenGeofiction) planet file. This was because the shapefiles were clearly being successfully generated on the site, but I didn’t have access to them – so it seemed the right level of challenge to try to replicate the process. It took me a few days to figure it out. Here’s what I found.

Just running the osmcoastline tool in what you might call “regular” mode (but with the right projection!) got me a set of files that looked right. Here’s the command line invocation I used:
YOUR-PATH/src/osmcoastline/build/src/osmcoastline --verbose --srs=3857 --overwrite --output-lines --output-polygons=both --output-rings --output-database "YOUR-PATH/data/ogf-coastlines-split.db" "YOUR-PATH/data/ogf-planet.osm.pbf"

Then you turn the mini self-contained database file into a shapefile set using a utility called ogr2ogr (I guess part of osmium?):
ogr2ogr -f "ESRI Shapefile" land_polygons.shp ogf-coastlines-split.db land_polygons

This gives a set of four files
land_polygons.dbf
land_polygons.prj
land_polygons.shp
land_polygons.shx

Here is a view of the .shp file in the QGIS Browser. Looks good.
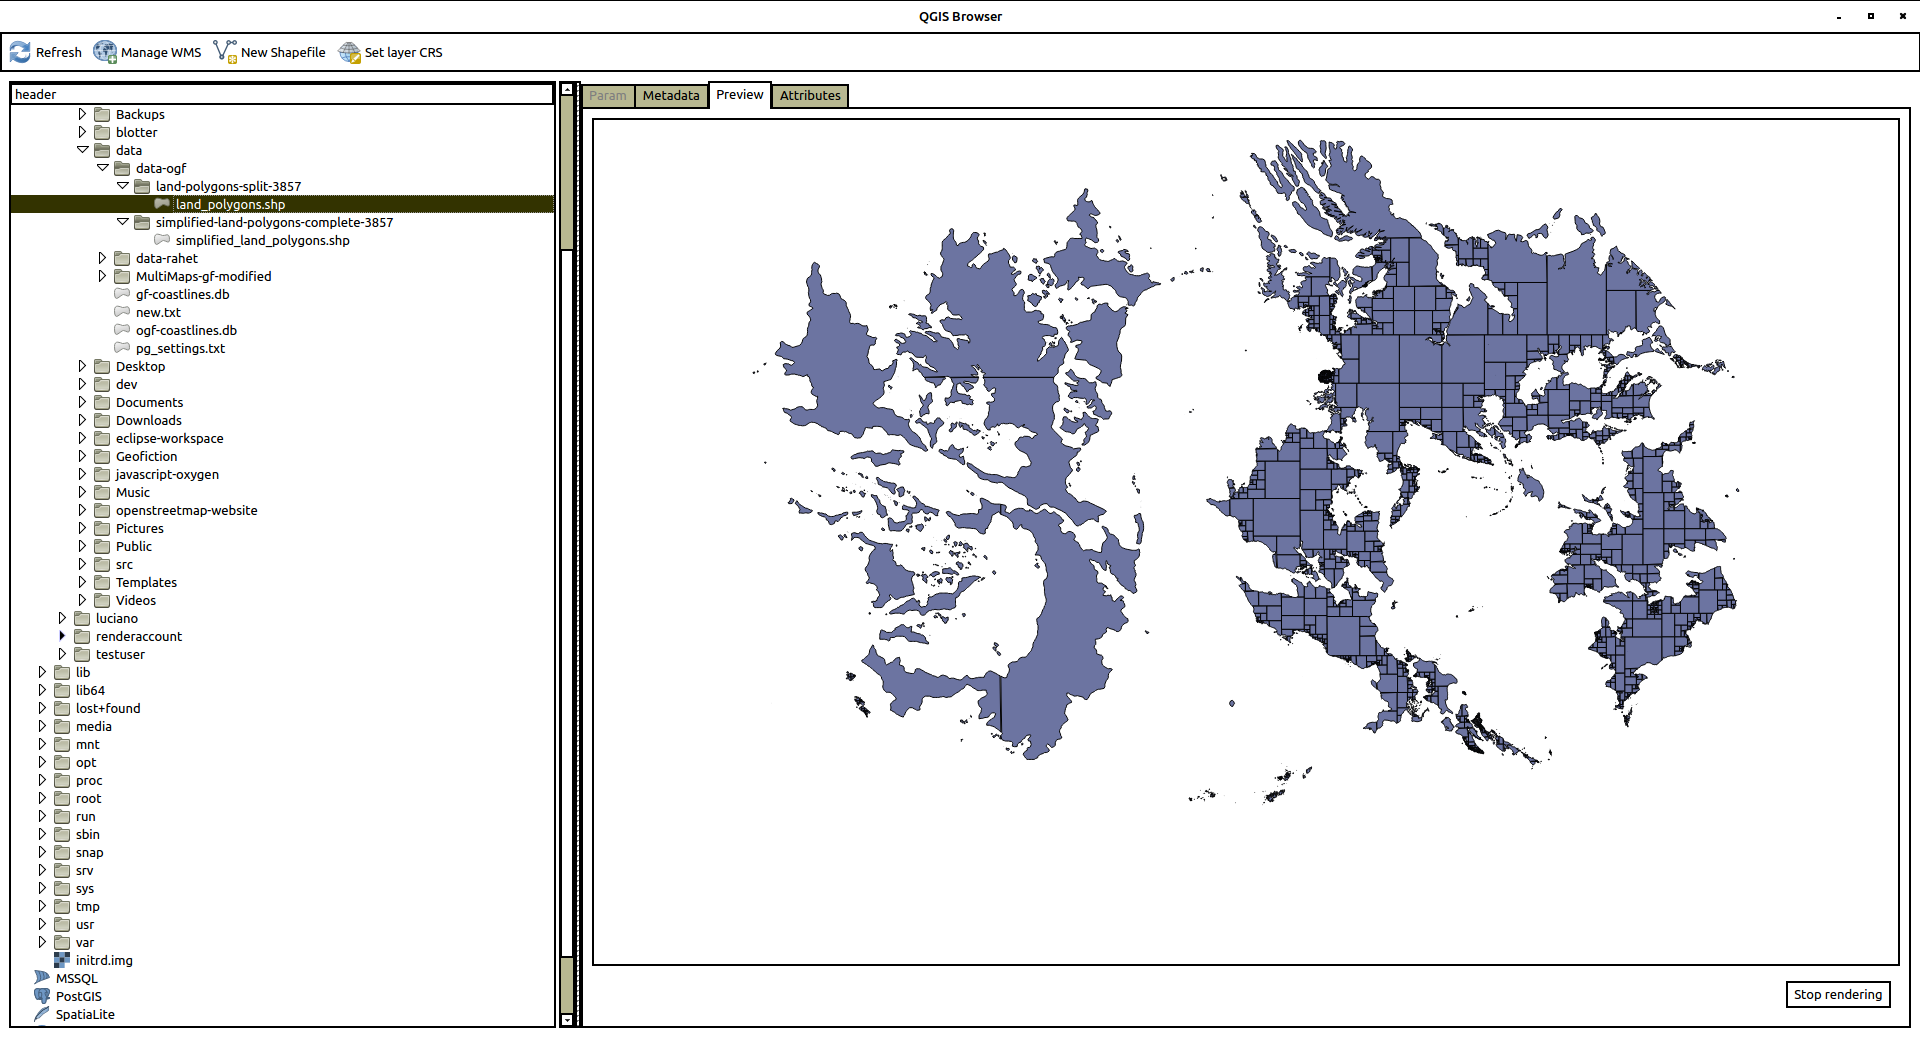
picture

I copied these files into the /openstreetmap-carto/data/land-polygons-split-3857/ directory, and I tried to run renderd. This alone doesn’t show the expected “ghost” of the OGF continenents, though. Clearly the simplified_land_polygons.shp are also needed.

So now I experimented, and finally got something “simplified” by running the following command line invocation (note setting of –max-points=0, which apparently prevents the fractal-like subdivision of complex shapes – technically this is not really “simplified” but the end result seemed to satisfy the osm-carto requirements):
YOUR-PATH/src/osmcoastline/build/src/osmcoastline --verbose --srs=3857 --overwrite --output-lines --output-rings --max-points=0 --output-database "YOUR-PATH/data/ogf-coastlines-unsplit.db" "YOUR-PATH/data/ogf-planet.osm.pbf"

Again, make the database file into shapefiles:
ogr2ogr -f "ESRI Shapefile" simplified_land_polygons.shp ogf-coastlines-unsplit.db land_polygons

This gives another set of four files
simplified_land_polygons.dbf
simplified_land_polygons.prj
simplified_land_polygons.shp
simplified_land_polygons.shx

And this .shp looks like this:
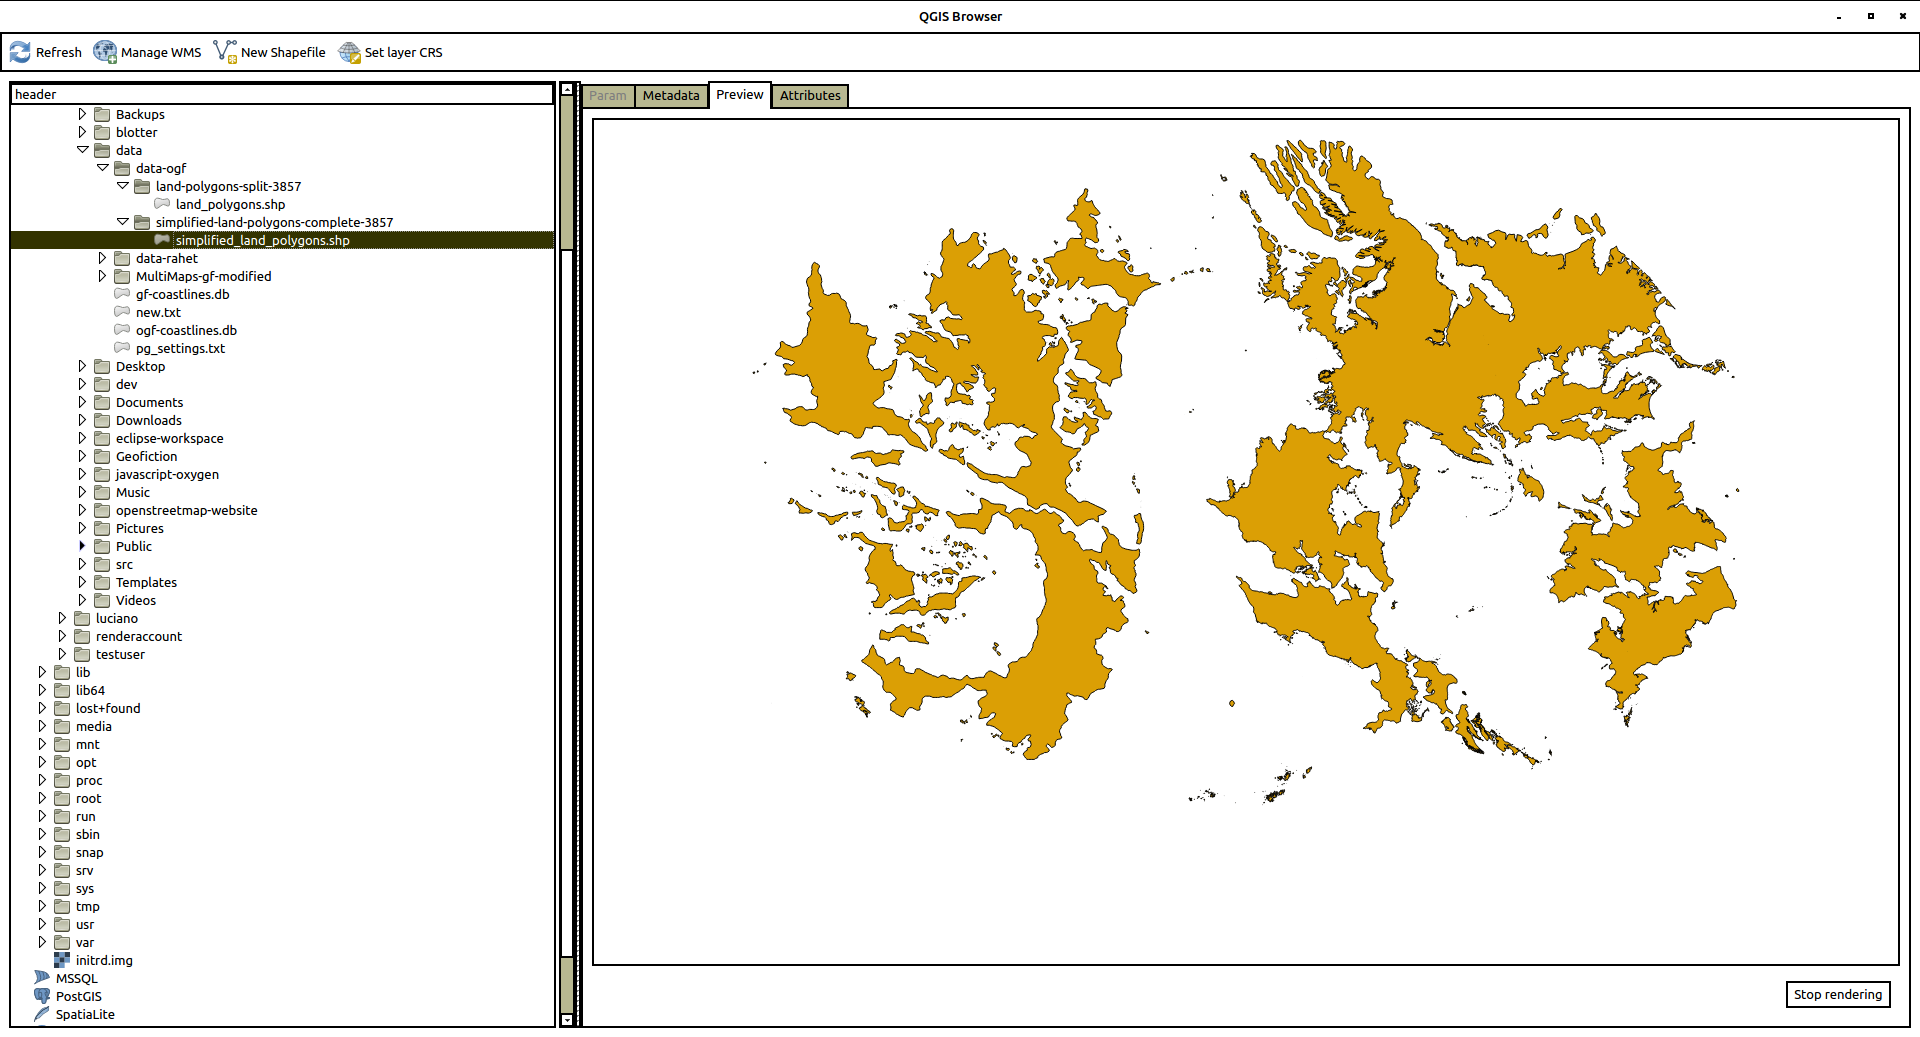
picture

Now when I copied these files to the /openstreetmap-carto/data/simplified-land-polygons-complete-3857/ directory, and re-ran renderd, I got a successful ghosting of the continents in the render (no screenshot, sorry, I forgot to take one).

Using osmcoastline for my own data

Now I simply repeated the above, in every respect, but substituing my own rahet-planet.osm.pbf file for the ogf-planet.osm.pbf file above. I got the following shapefiles:

land_polygons.shp
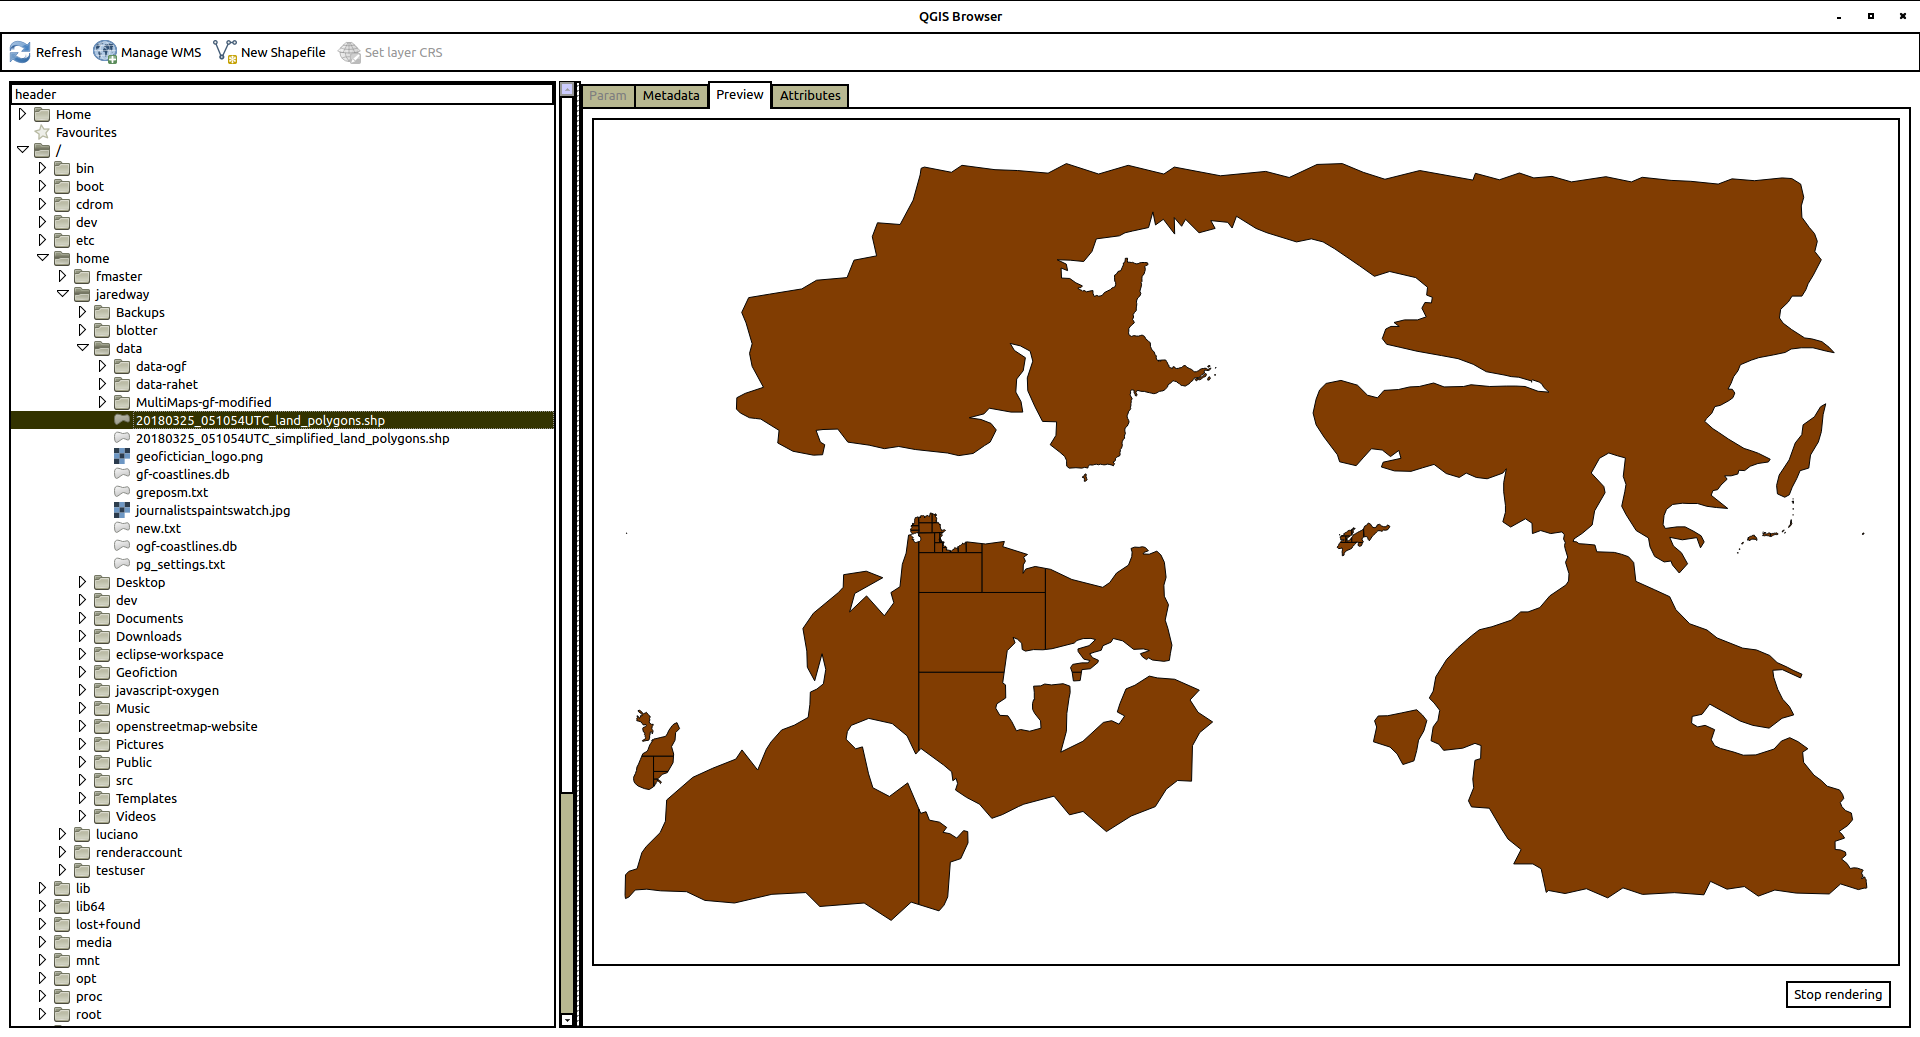
picture

simplified_land_polygons.shp

picture

And these, copied to the appropriate osm-carto data directory locations, gives me the beautiful render you see now. [EDIT: Note that the view below of the Rahet planet is “live”, and therefore doesn’t match what shows in the screenshots above. I have moved in a different concept with my planet, and thus I have erased most of the continents and added different ones, and the planet is now called Arhet.]

I actually suspect this way that I did it is not the completely “right” way to do things. My main objective was to give the osm-carto shapefiles it would find satisfactory – it was not to try to reverse-engineer the actual OSM or OGF “coastline” processes.

There may be something kludgey about using the output of the second coastline run in the above two instances as the “simplified” shapefile, and this kludge might break if the Rahet or OGF planet coastlines were more complex, as they are for “Real Earth.” But I’ll save that problem for a future day.

A more immediate shapefile-based project would be to build north and south pole icecaps for Rahet, in parallel with the “Real Earth” Antarctic icesheets that I disabled for the current set-up. You can see where the icecaps belong – they are both sea-basins for the planet Rahet, but they are filled with glacial ice, cf. Antarctica’s probably below-sea-level central basin. And the planet Mahhal (my other planet) will require immense ice caps on both poles, down to about 45° latitude, since the planet is much colder than Earth or Rahet (tropical Mahhal has a climate similar to Alaska or Norway).

Happy mapping.

Music to map by: Café Tacuba, “El Borrego.”

Progress Made!

[Update 20180923: continued from here]

The OSM “Rails Port” is now running on my server, and I have successfully connected to the api via JOSM and rebuilt my test-version of my planet, Rahet.

It took me an entire week of googling and meditating before I solved the port problem. Ultimately, I was looking in the wrong place for clear documentation about it – I was hoping someone would write about it from the perspective of Rails, but finally I found the documentation that made it possible on the Passenger website, buried in an example. There’s a line that belongs in the apache config file, “PassengerRuby /usr/bin/ruby2.3” (or whatever version).

And that made all the difference.

Here’s the link: MAP. [UPDATE 20210530: that link is broken – the test server is closed down. I am running a “live” planet for multiple users based on this original, at arhet.rent-a-planet.com]

So now you can look around. It’s just the “out-of-the-box” OpenStreetMap website (AKA Rails Port), with some minimal customization where I could find where to do it easily. I’ll continue working on that. I might actually disable the iD and Potlatch editing tools – I always use JOSM, and if it ever reaches a point where I’m allowing or inviting others to edit, I would make JOSM-use a prerequisite, I’m certain. JOSM, with its steep learning curve, seems like it would be a good way to “filter” people on the question of how serious they’re taking a project.

There are a number of features that don’t work. I would like to figure out a way to disable the user sign-up page. That’s a kind of vulnerability for the types of use I’m intending for this set-up. Meanwhile, I’ve disabled in a rather inelegant way by “breaking” the sign-up page (by changing its name inside the appropriate folder on the app/views/user path).

I’m happy.

I’ll write up how I figured out the coastline problem, tomorrow, and begin working on deciding what features to retain versus which to change in the Rails Port (i.e. think about customization).

[Update 20180923: continues here]

Music to map by: Run The Jewels, “Talk To Me.”